Table of Contents
Stripe Integration for Event-Ticketing
With our Stripe integration, you can easily sell tickets through Sweap.
Below you will find helpful information to better understand ticket sales via Sweap using Stripe.
The checkout process is handled through a link generated by Stripe. The familiar Sweap registration process remains intact, and the ticket buyer will be redirected to the Stripe page to complete the payment process.
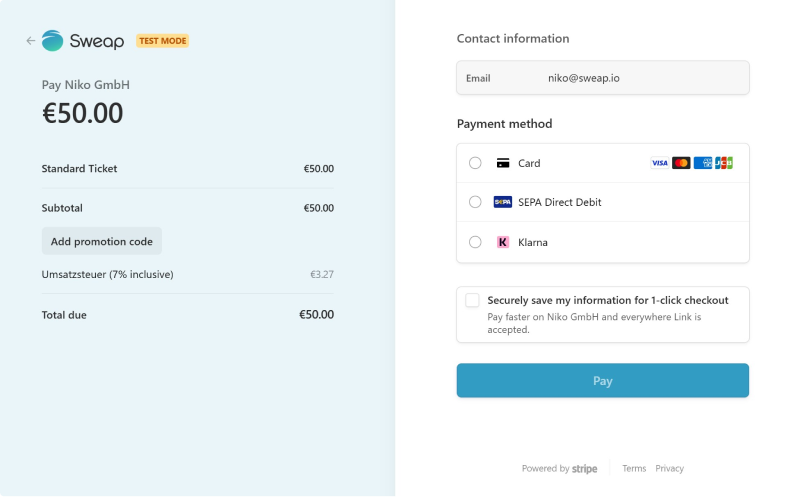
After the payment is made, the guest will be redirected back to our registration page.
1. Preparations for Setup
Like most services, Stripe offers different plans. For the integration between Sweap and Stripe, we use Stripe Connect with standard accounts.
If you already have a Stripe account, your Sweap account can be connected via Stripe Connect. If you do not have an account yet, you can use the same link to create an account, and the accounts will automatically connect afterwards.
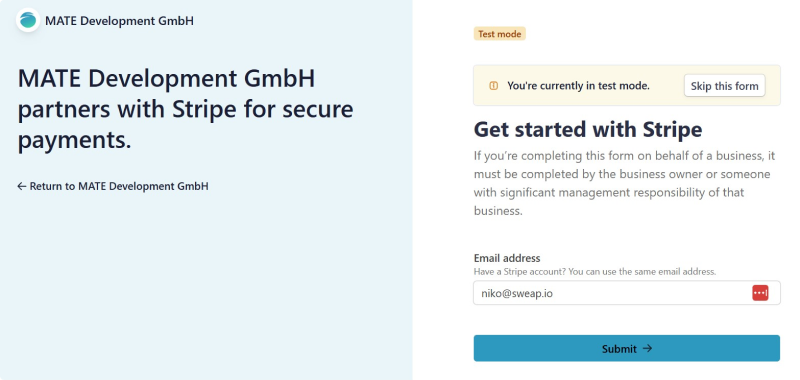
To use the Stripe integration and obtain a Connect link, please contact our sales team or your Customer Success Manager.
2. Setup
Once you have access to your account, you need to configure some settings in Stripe and inform us to use our ticketing feature in Sweap with Stripe.
Stripe offers an extensive test mode, which you can activate anytime in your Stripe account settings.

All settings must also be configured for the test mode, provided you wish to use it.
2.1 VAT Rates
These details are required to apply the appropriate tax to tickets created in Sweap, ensuring that ticket prices are calculated correctly for tax purposes. You have the following options:
- Set a fixed VAT rate, e.g., 19% for Germany
- Multiple fixed VAT rates, e.g., for different countries or ticket categories
- Stripe Tax, which automatically identifies the correct tax rate based on precise location detection (additional fees may apply at Stripe depending on your license)
You can manage your tax rates under Product Catalog > Tax Rates

Tax rates must be set as inclusive since ticket sales are gross (including tax).
If you opt for one or more fixed tax rates, please provide us with the tax rate IDs corresponding to your tax rates (e.g., txr_1PiBKmESzLovSms8y6WJRova) for both your live and test accounts.
If using Stripe Tax, simply let us know; no additional IDs need to be provided.
2.2 Coupons
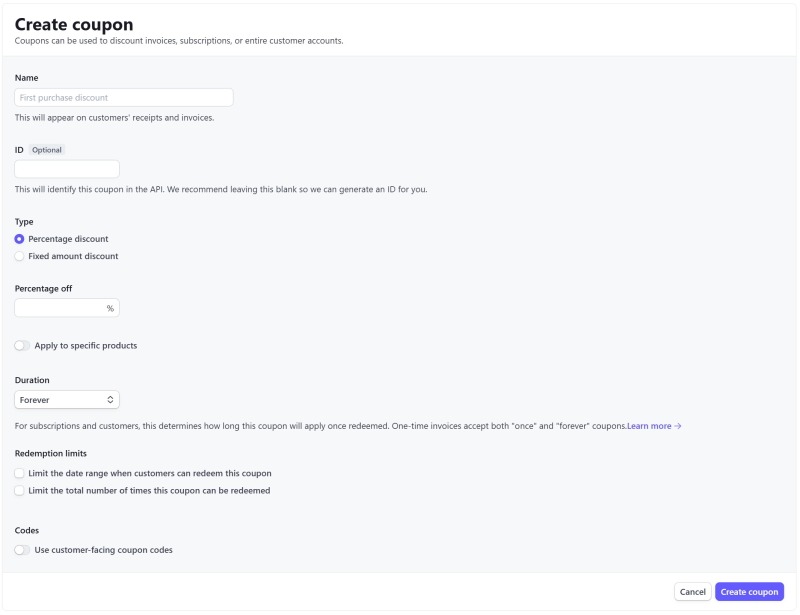
Coupons codes can be used to offer discounts on your ticket prices, similar to coupons and discount codes. It's important for us to know if you intend to use coupons for proper integration setup.
Coupons codes can be managed later under Product Catalog > Coupons.
Coupons codes can always be applied to all tickets via Stripe Connect. You can create different coupons for your guest groups, limit their usage by quantity or time, and set a minimum order value.
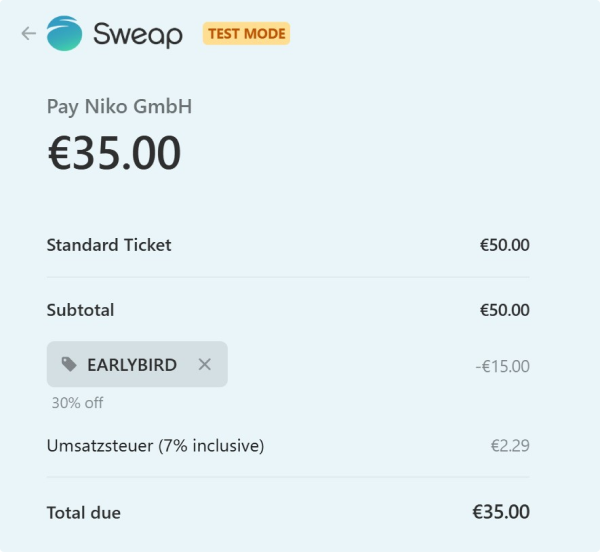
You do not need to create an additional field in the registration form for coupons. After registration, guests will be redirected to Stripe and the payment process where a field for entering codes will automatically appear.
2.3 Sweap Test and Live Integration
As mentioned earlier, Stripe offers an extensive test mode that you can activate in your Stripe account settings. Additionally, we offer the option to initially activate the Sweap integration for testing purposes. In this mode, real payments cannot be processed, allowing you to test the entire registration and checkout process from a guest's perspective.
To simulate payments in test mode, you can use the following Stripe test data: Stripe Test Data.
We recommend thoroughly utilizing the test options to identify setup errors early. Please note that either the test or live integration will be activated for your entire Sweap account. Therefore, it's not possible to work with test data within an event while simultaneously processing real transactions.
2.4 Summary
You'll need a Stripe account. We will send you a Stripe Connect link to automatically connect your Sweap account.
We'll then need from you:
- Tax rate IDs for the VAT rates you've set up for both test and live environments, ensuring they are set as “inclusive.”
- Confirmation of whether you'll be using coupons.
3. Further Topics
3.1 Payment Methods
We have pre-configured payment methods, which are standard in our setup. It's recommended to review these and make changes as needed. You can manage your payment methods under Settings > Product Settings > Payments > Payment Methods.
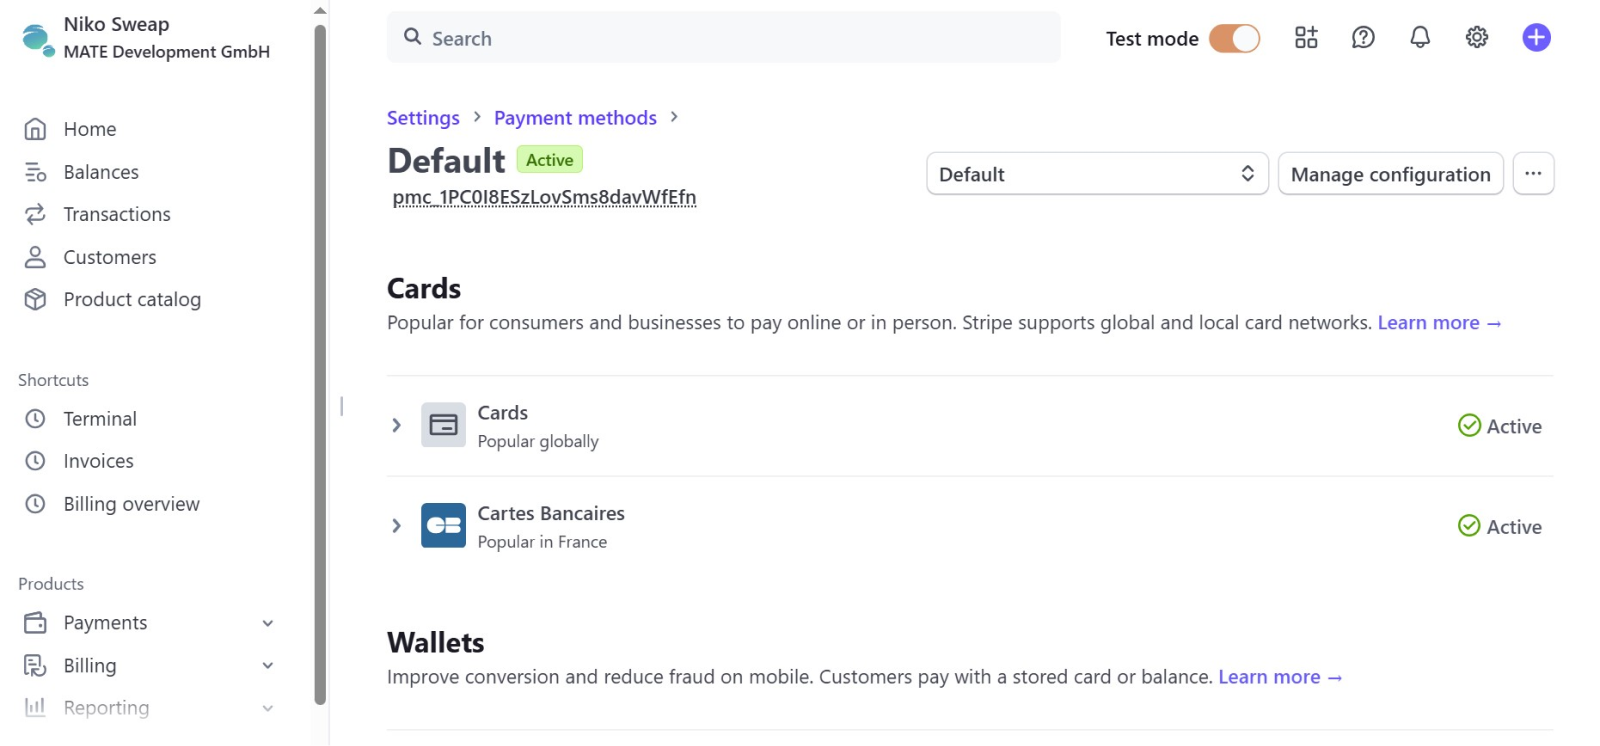
Please note that PayPal is unfortunately not available with Stripe Connect. If you wish to offer SEPA payments, consider that these may take up to 14 business days to be completed according to Stripe. Only then will the ticket in Sweap be activated and sent.
To ensure your guests receive their tickets on time and payments are successfully completed, we recommend closing your registration pages early or deactivating the SEPA payment option in advance of your event.
You can remove payment options at any time in Stripe. However, transactions already started will still be completed. You can also track all transactions and their current status through your Stripe dashboard.
Here's a guide for selecting the right payment methods.
3.2 Tickets for Companions
Registrations in Sweap are personalized, so currently, purchasing multiple tickets under one person's name is not supported. However, you can purchase additional tickets for companions.
3.3 Sending Invoices in Test Mode
In test mode, automatic invoices are not sent.
You can still test the design of the payment receipt. To send a test invoice, open the action menu (three dots) in the Transactions section and click on “Send Receipt," then enter your email address. Alternatively, you can access the relevant payment, scroll down to the Receipt History section, and manually send a payment receipt from there.
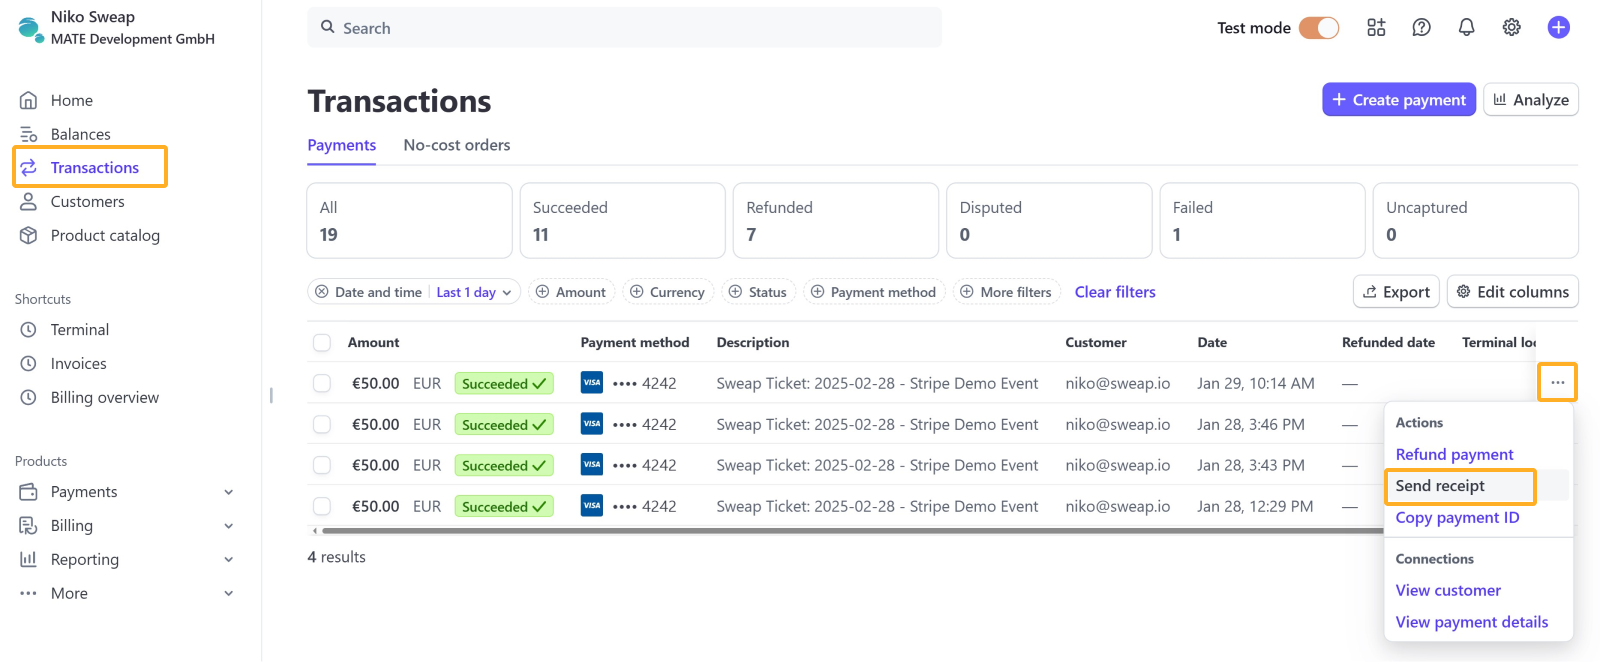
For more information on sending email notifications with Stripe, see Sending Customer Emails.
3.4 Customize Your Invoices
You can automatically send an invoice to your guests through Stripe. You can customize the design of this invoice and provide additional information, such as a standard message or footer.
Settings can be found under Settings > Billing > Invoices.
Here's more information on customizing invoices.
3.5 Branding the Checkout Page
You can customize the Stripe payment page where guests are redirected during registration. Settings are available under Settings > Business > Branding > Checkout & Payment Links.
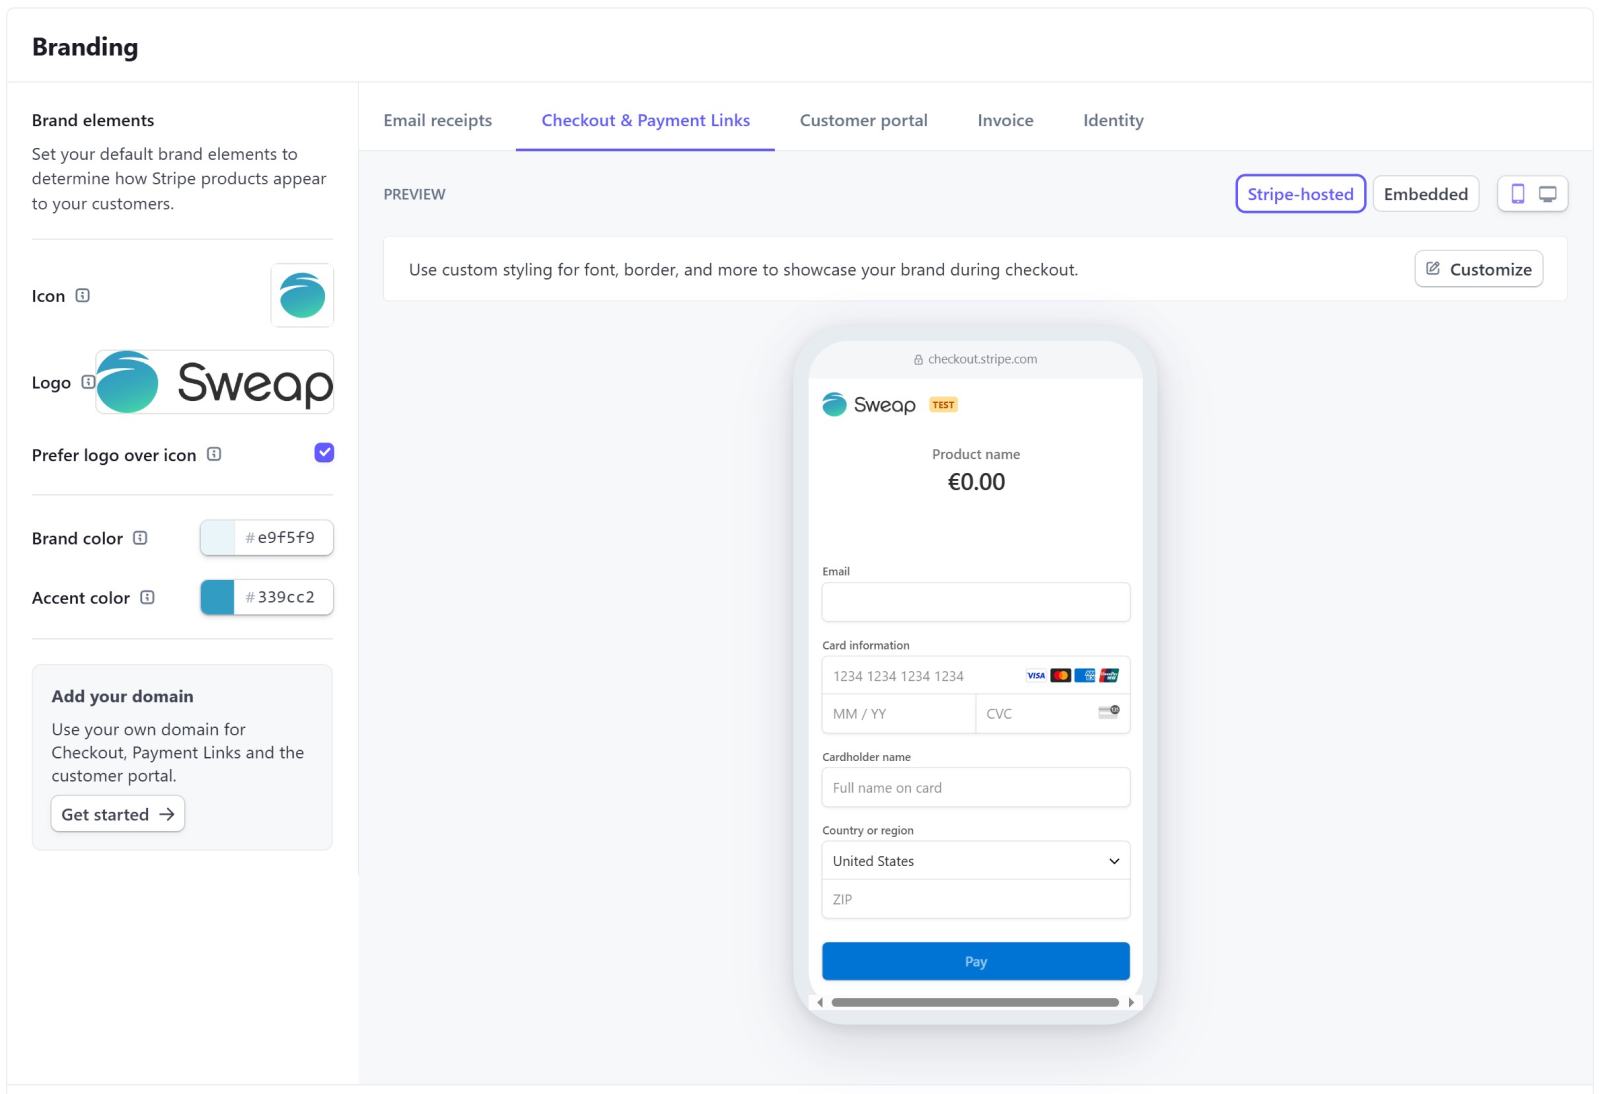
More information on branding for your Stripe account can be found here: Branding for Your Stripe Account.
3.6 Deleting (Test) Purchases & Canceling Invoices
Guests who have purchased a ticket cannot be deleted from the guest list in the usual manner. This is because a payment via Stripe is linked to the guest's record, requiring the payment to be refunded before the guest can be deleted.
This behavior applies to the test mode in Sweap as well. Both Stripe and Sweap simulate real payment transaction processes.
To refund a payment, open the action menu (three dots) in the Transactions section and click on Refund Payment.
3.7 Cart abandonment
Cart abandonment in e-commerce is common, and you can find many interesting statistics online about this topic. Sweap, through its use of Stripe, aims to prevent many of the known reasons for cart abandonment.
However, please be aware that abandoned transactions cannot automatically be interpreted as cancellations of attendance to your event. For example, seeing “Failed (Timeout)” in the payment status of your guest list usually means that someone started but did not complete the payment process.
Here's a general article on the topic: The top eight reasons for basket abandonment – and what they can tell you about your business
3.8 Notifications in Stripe
In your Stripe account, you can enable email notifications for various events – such as successful payments, disputes, or high-risk transactions. These notifications help you stay informed about important activity in your Stripe account in a timely manner.
You can manage these settings in the Stripe Dashboard under Settings > Personal Settings > Communication Settings. Each team member can individually choose which events they’d like to be notified about and how they receive those notifications. Within organizations, notifications can also be enabled or disabled separately for each team member.
3.8 Stripe Support
Sweap uses Stripe Connect to provide you with a secure and effective way to handle paid events. Please note that we can only assist you with questions regarding Sweap and its integration with Stripe. Unfortunately, we cannot answer questions about creating a Stripe account, its different license models, or Stripe features.
