Table of Contents
Configure emails using a dynamic modular system
 Updated
by Julia Walther
Updated
by Julia Walther
We'll show you how to set up emails with our dynamic email builder. You can design your means of communication flexibly according to your wishes.
To create an email, go to your event.
You can create an email from the dashboard or go directly to the “Communication” section and start creating your email from there.
Create an email
Create an email via event dashboard
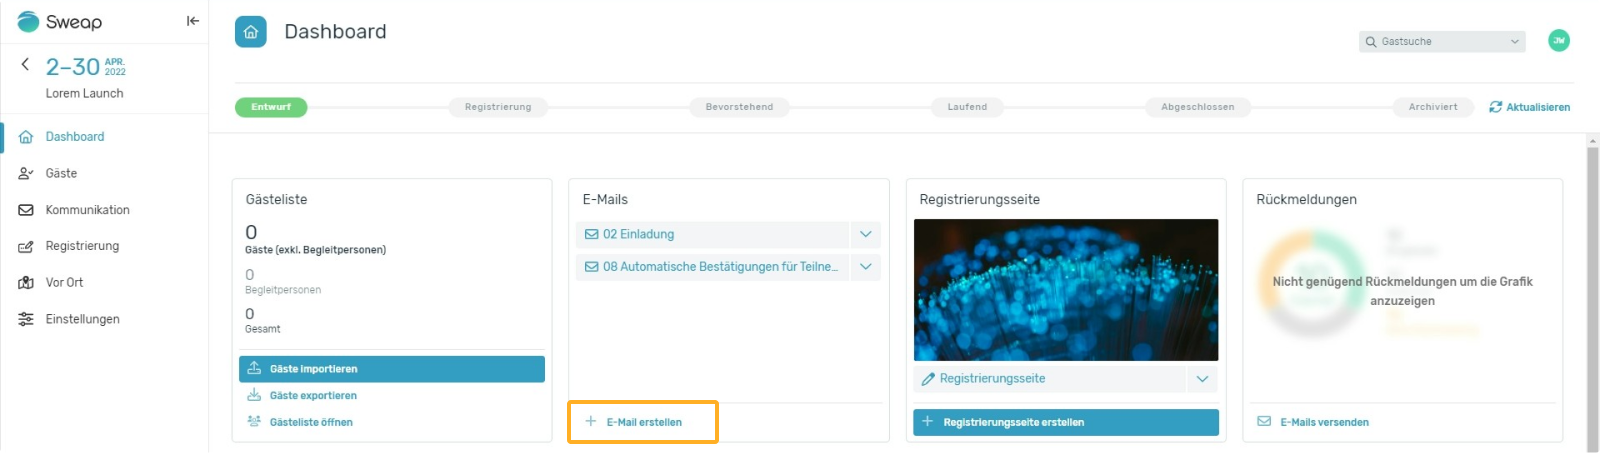
Click on “+ Create email” in the dashboard. This button takes you to the email builder, where you can set up your email.
Create an email via the area "Communications"
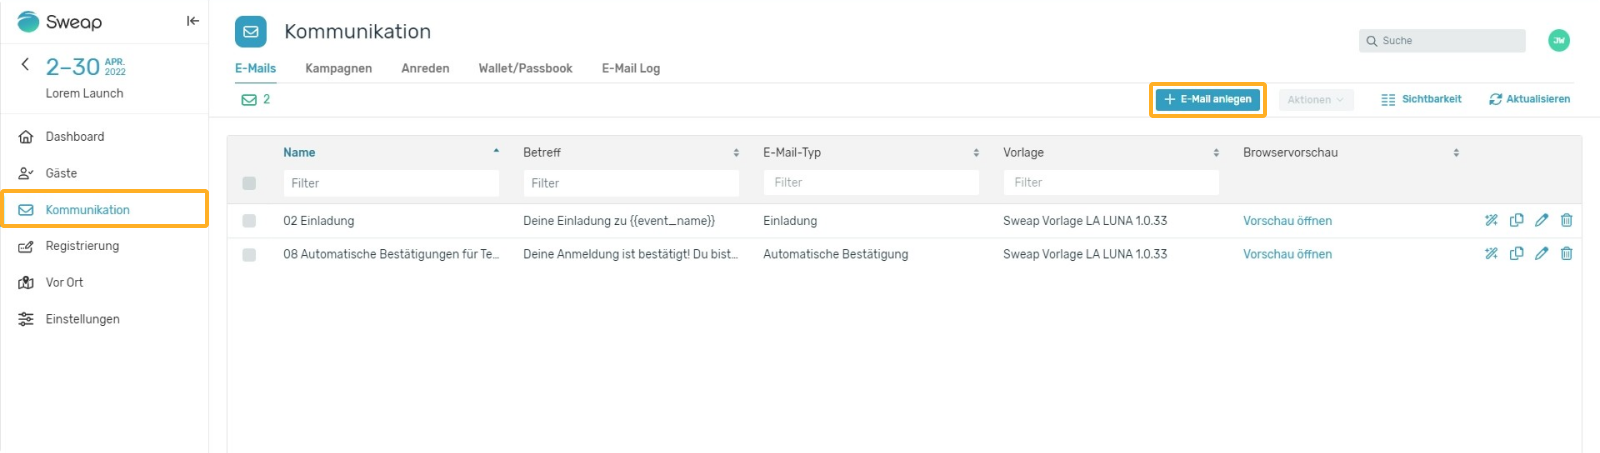
Click on “+ Create email” in the “Communication” section. This button takes you to the email builder, where you can set up your email.
Configure an email
Regardless of whether you create your email from the dashboard or via the Communication section, you will first be taken to our dialog box for configuring your email.
Step 1 - Define you email details
Define the following details in the first step:
- Email type
- Internal email name
- Language
Step 2 - Customize sender information
Define the following details in the next step:
- Sender email address
By default, the sender email address is “mail@sweapevent.com”. You can also enter your own sender email address, you can find more information here. - sender name
- Email subject
You can also use placeholders in the email subject. More information about placeholders can be found here. - Reply email address
Step 3 - Template selection
The last step is to select your template.
You can choose between the Sweap template and our La Luna template. The templates already take into account the email type you have previously selected, so that all the necessary standard components are built in for you.
Click on “Create” and you will be taken to our dynamic email builder. With the flexible modular system, you can now give free rein to your creativity and design your emails to suit your needs and taste.
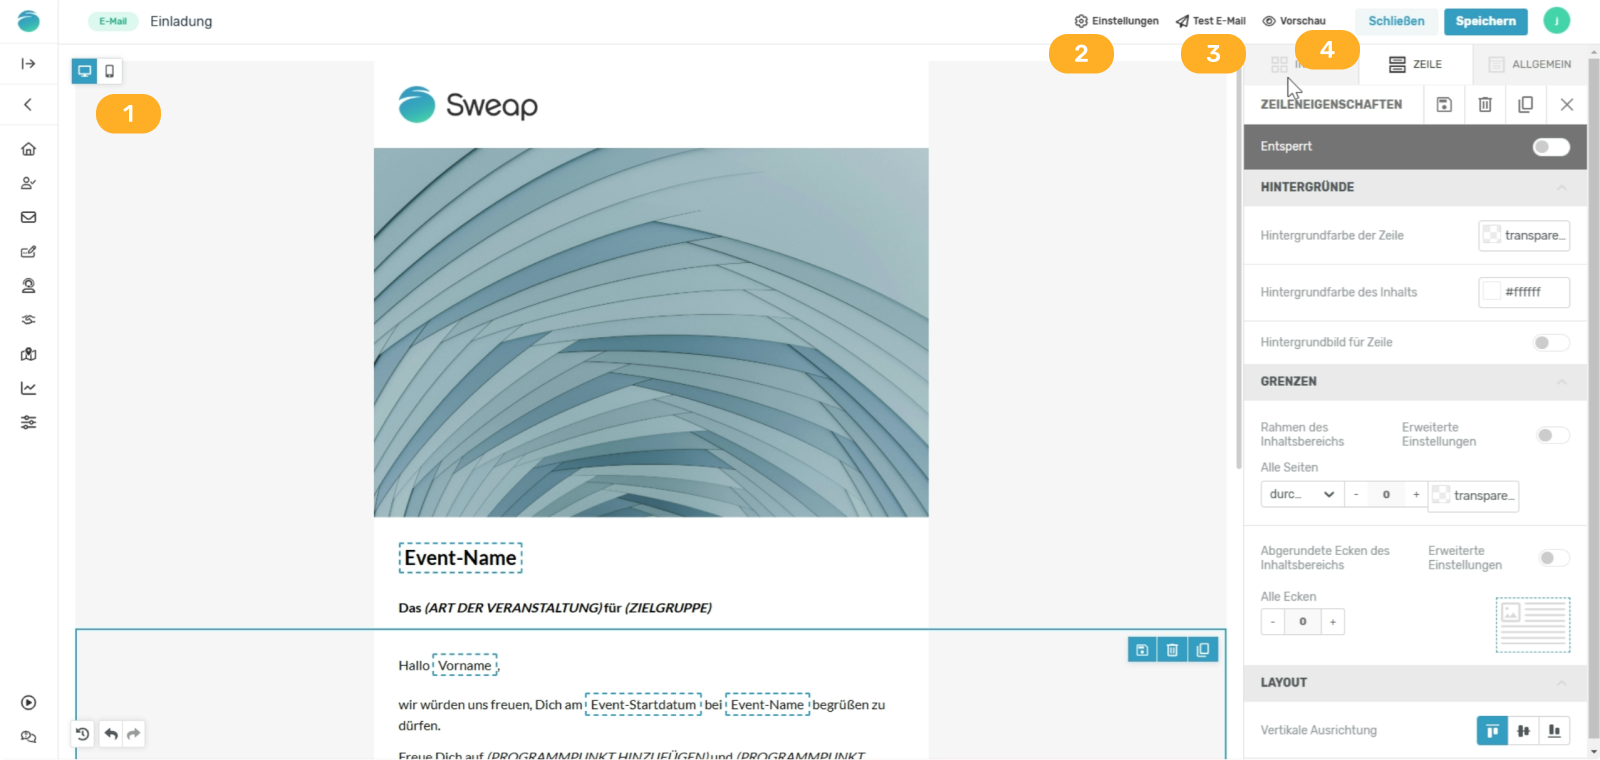
1) Our email builder offers a live preview - you can track your changes directly.
You can switch between a desktop view and a mobile view. This allows you to optimize your email for mobile reception as soon as you create it.
2) You can further configure your email under “Settings”.
Among other things, you can adjust the internal email name or the previously stored sender information.
The advanced settings can also be found here, where you can, for example, link the associated registration page. This function is relevant if you want to use multiple registration pages. This scenario can occur if you divide your guests into different segments.
3) Test your email by sending yourself a test email.
4) Use the additional preview mode.
Design your email content
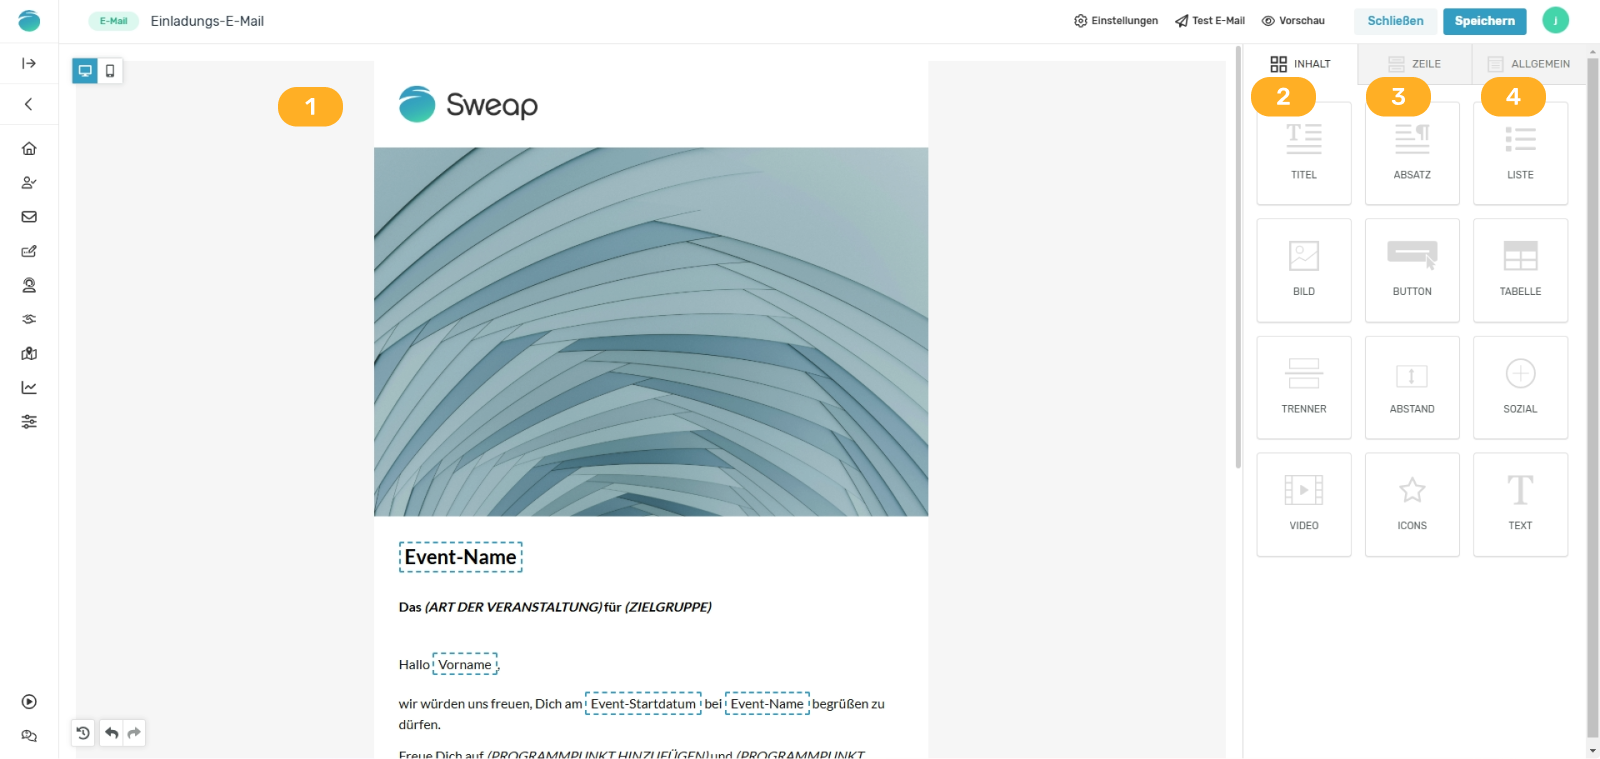
1) Your workspace is in the center. Here you can design your email and always see a preview of your work.
2) Under “Content” you will find content blocks (building blocks) that you can add.
3) Under “Line” you will find structural elements that already contain various building blocks such as text, images or buttons. Here you will find a selection of different, already designed rows from which you can choose.
4) Under “General”, you will find general settings that you can define for your email.
We will go into the “Content”, “Lines” and “General” areas in more detail below so that you have all the information you need.
Content
Content is the building blocks you use to design an email. You can choose from a variety of building blocks that you can simply drag and drop into your design.
- Title
Use this to define a title line in your email.
- Paragraph
Use this to define longer texts that require further formatting.
- List
Insert a list with this content block.
- Image
Content block to insert an image.
- Button
Use this content block to insert a button that you can freely define.
- Table
Use this content block to insert a table.
- Separator
Use this content block to create a separator between individual content / lines.
- Spacing
Use this content block to increase the space between two contents / lines.
- Social
Use this content block to insert social media icons and links. You can add Facebook, X (formerly Twitter), Instagram and LinkedIn.
- Video
Content block to insert a video.
- Icons
Use this content block to insert icons.
- Text
Use this to define short, concise text elements - note the rather limited formatting options. If you need further formatting options, you can use the “Paragraph” block.
Rows
A row is a structural element that can hold various content blocks such as text, images or buttons. It helps to organize content logically and create a clear layout.
You can arrange several columns in a row to create flexible designs. Each row can be customized so that your email design remains visually appealing and functional.
You will find ready-made rows here that you can populate directly.
You also have the option of using “empty” lines that you can fill with content yourself.
Here are a few common uses of lines in email designs:
Row type | Usage | Example |
Single column | Text or large image | Headline and introduction for your event |
Two columns | Text left, image right | Presentation of your event |
Three columns | Icons side by side | Social Media informationen |
Nested columns | Complex layouts | Multi-level content |
General
The “General” section includes basic settings that affect the entire design. Here you can make global adjustments to your email layout so that your content looks consistent.
While rows and content are responsible for individual sections of your email, the “General” section allows you to make overall adjustments - from colors to fonts.
General properties
- Content width
Use this to define the width of your email and the entire layout. We recommend a width of 600px, which usually ensures that an email is displayed optimally on both desktop and mobile devices. - Alignment of the content
You can choose between a left-sided or centered alignment of your content. - Background color
Here you define the color of the outer background.
- Background color of the content
Here you define the background color of your content blocks globally.
- Background image
You can add a background image. Please note that background images are not compatible with all email software. If background images are not supported, the background color of the line is used. Therefore, make sure that the line color matches the content.
- Default font
This is where you make your global setting for the font used.
- Link color
Define the color in which links are displayed.
Guest links and tokens in your email
What are guest links?
Guest links are clickable, personalized links that are embedded in emails or websites and allow guests to perform actions.
- Registration via form / Edit registration
{{guest.invitationEditUrl}}
Guests can register for the event or edit their previous response. - Direct confirmation
{{guest.invitationAcceptUrl}}
Guests can confirm their participation. - Direct decline
{{guest.invitationDeclineUrl}}
Guests can cancel their participation. - Access to the virtual event platform (VEP)
{{guest.virtualEventUrl}}
Guests are forwarded directly to the event platform. - QR code for the guest
{{guest.ticketQrCodeUrl}}
Integration of the ticket code belonging to the guest via QR code. - Download tickets
{{guest.walletUrl}}
Guests can download their personalized tickets, wallet passes or PDF tickets. - Add event to calendar
{{guest.iCalUrl}}
Guests can add the event directly to their calendar.
What are tokens?
Tokens, also known as placeholders, make it possible to automatically insert guest or event data into emails or websites. The most common tokens include
- Guest name: Automatically inserts the guest's name.
- Event details: Inserts information such as event location, date and time.
- RSVP status: Provides information on whether the guest has confirmed or declined their participation.
By using tokens, each email is personalized and offers recipients a relevant, individual experience.
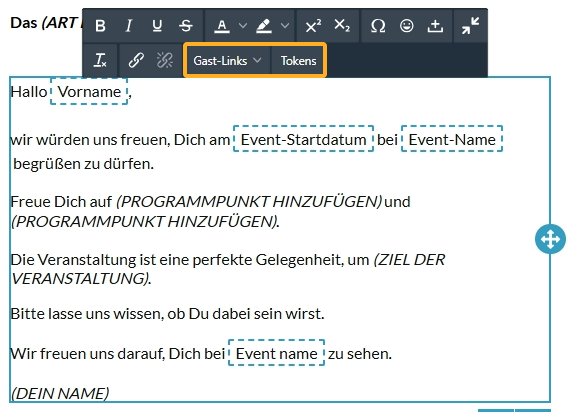
Define invitation settings using guest links
Our “Accept” and “Decline” buttons are defined using guest links.
When you create an invitation, both buttons are already provided with the necessary guest links by default.
You can use guest links to define the following variants for your guests:
- Activate registration via form
Use the guest link{{guest.invitationEditUrl}}
(implemented by default in the invitation) - Activate direct confirmation
Use the guest link{{guest.invitationAcceptUrl}} - Activate direct decline
Use the guest link{{guest.invitationDeclineUrl}}
(implemented by default in the invitation)
Activate registration via form
This function takes the guest to your registration page by clicking on the registration / accept button, where they will find the corresponding registration form. The guest can now enter their details and register for your event by submitting the form. This function should be used if you want to request additional data from your guests that you do not yet have.
If your event scenario is such that you do not want to use a registration form but still want to send your guest to your registration page, remove or deactivate the registration form.
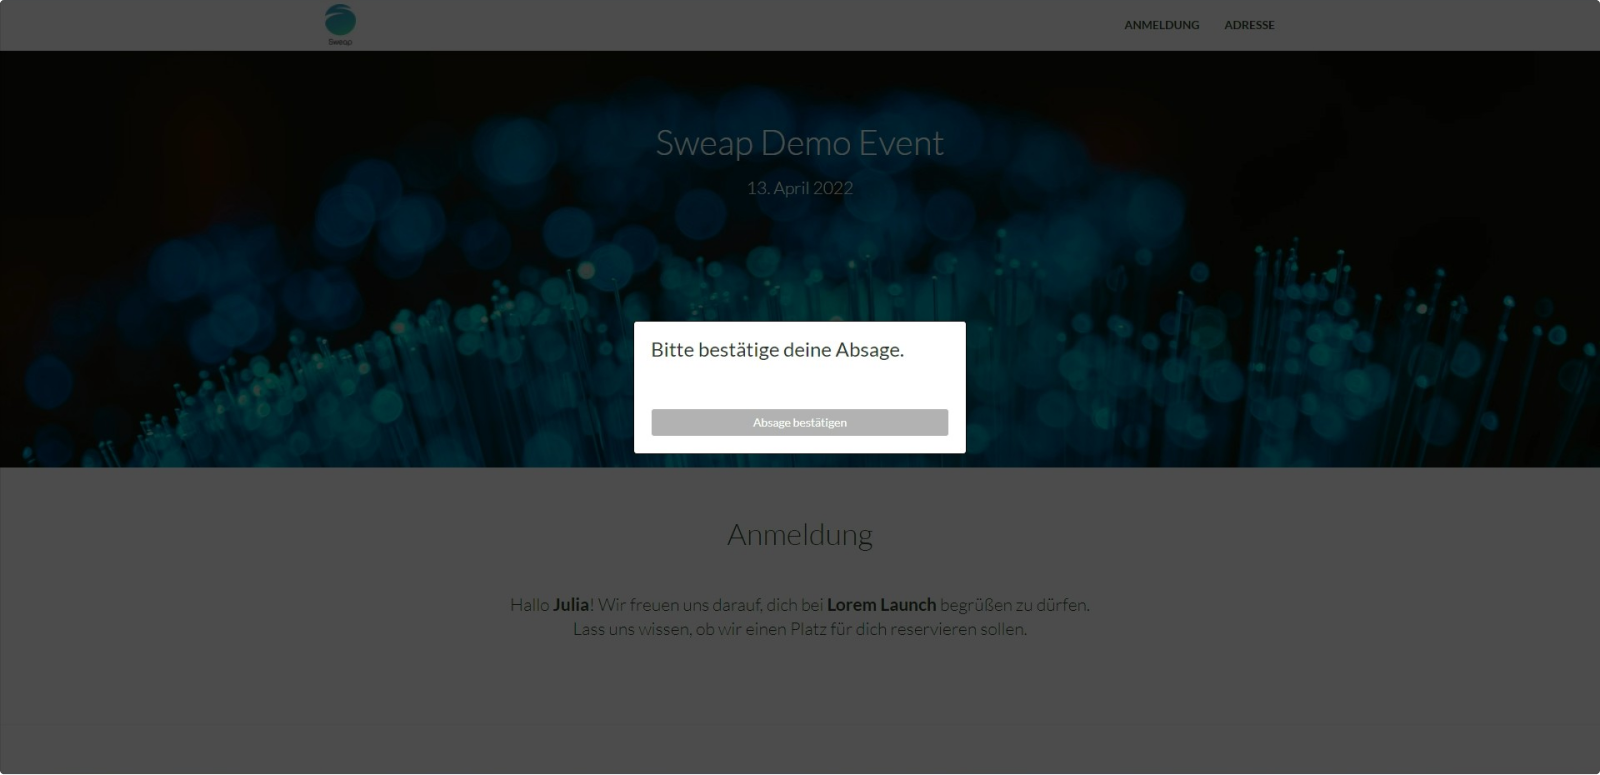
Direct confirmation
If you activate the confirmation directly from the email, you will redirect your guest to your registration page, but no registration form will be displayed. The guest cannot enter any further details. Your guest only has to agree to register for your event in a pop-up window on the registration page.
This is necessary to prevent unwanted acceptance or rejection by bots or similar systems.
Direct decline
To enable your guest to cancel, you can use the direct cancellation function.
As with direct confirmation, the guest is taken to your registration page where they must confirm in a pop-up window that they wish to cancel their registration for your event. This is necessary to prevent unwanted acceptance or rejection by bots or similar systems.
If you do not use this function, your guest will have no other option than to make entries in the registration form to confirm the cancellation. It can be assumed that only a few guests will make this additional effort, which would reduce your response rate. We therefore recommend activating the direct unsubscribe option in the e-mail.
You can define the pop-up windows for direct acceptance and direct rejection in the settings of your registration page.
E-mail tests and finalization
Once you have finished designing your email and all the content has been entered, you can initiate the sending of a test email. To use the e-mail test function, click on “Test email”. A dialog box will open in which you can configure the test options.
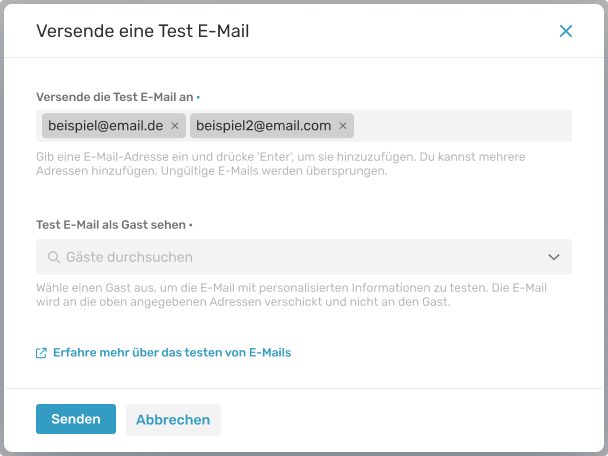
You have the option of sending your test e-mail to several recipients at the same time. Simply enter the desired email addresses in the field provided and confirm an email address by pressing the Enter key.
In the second step, you select a guest from your guest list whose data will be used to fill the tokens / placeholders used in your email. Alternatively, you can also use one of the test guest data sets provided by us. All recipients of the test email will see the message as if it were personalized specifically for the selected guest.
You can find out more about sending test emails here.
Once you have made all the settings for your email, don't forget to save it. Your email has now been successfully created and can be sent.