Table of Contents
Show and hide form fields
 Updated
by Ingo
Updated
by Ingo
In some web forms, further entries should only be requested if a checkbox is ticked or a value of a dropdown / radio button has been selected. The query for accompanying persons is already stored in the form editor. For further queries, such as an optional billing address or other additional queries, JavaScript codes are required. In the following, we show this for the use of a checkbox and for the use of a radio button / a dropdown selection.
Show and hide fields with a checkbox
This is how you access the Javascript editor in the template "Registration form", within the website builder:
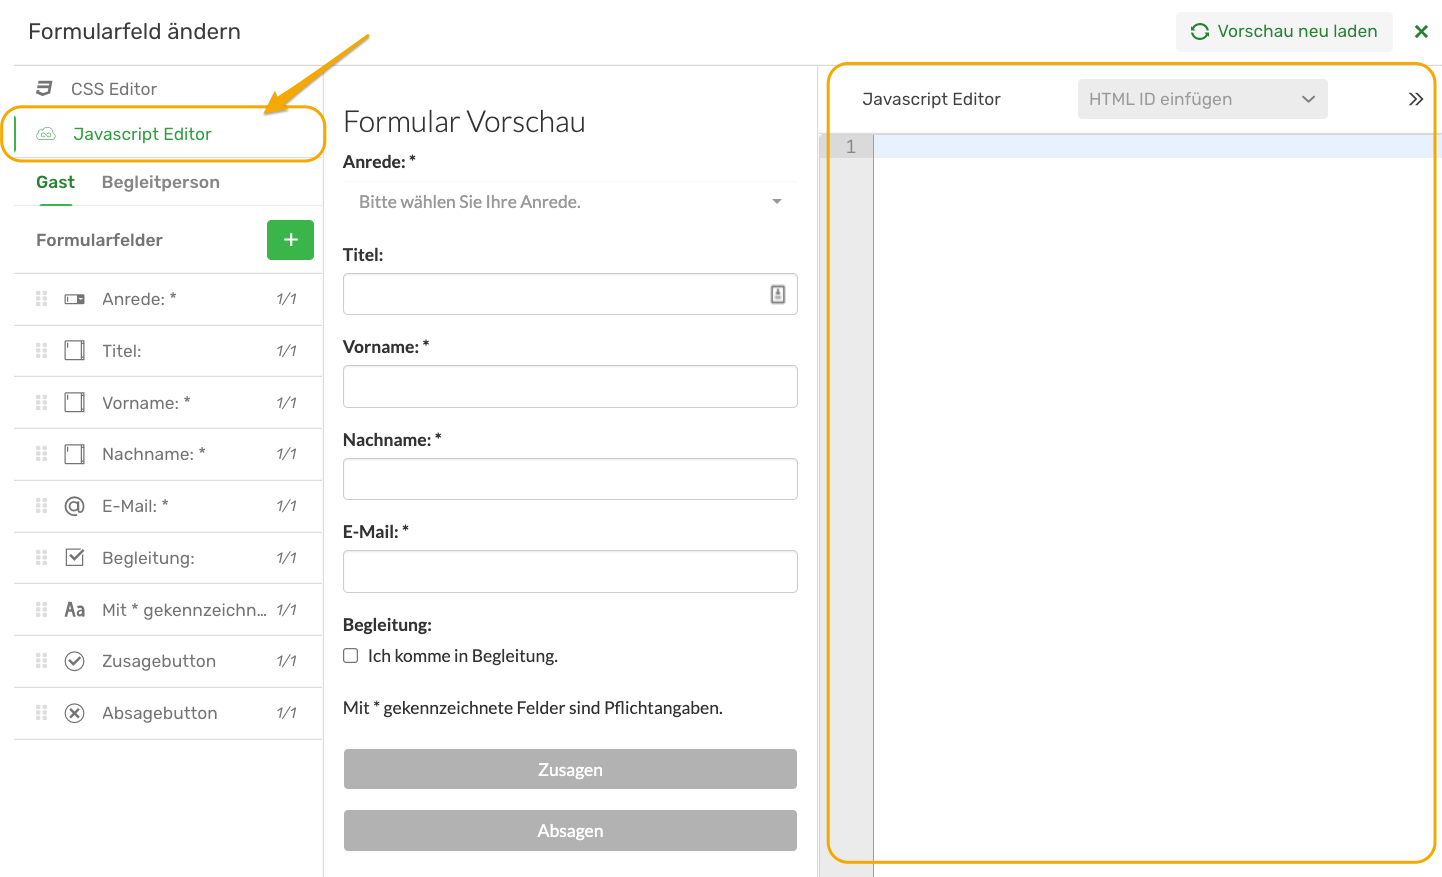
The following JavaScript code line must now be inserted in the website generator in the module "Registration form" in the JavaScript area so that the fade-in and fade-out is programmed:
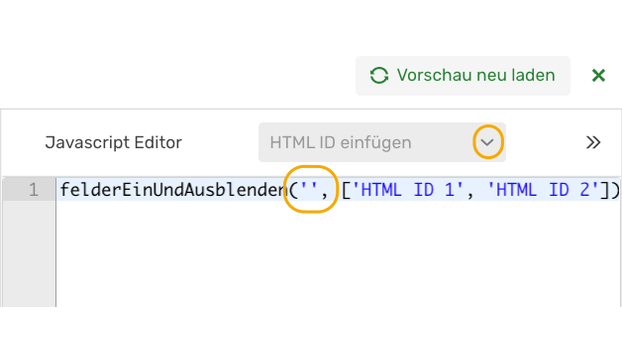
felderEinUndAusblenden('HTML ID Checkbox', ['HTML ID 1', 'HTML ID 2']);However, the placeholder HTML IDs still have to be replaced with the correct values.
The HTML ID must first be entered in the JavaScript code for the checkbox in the first placeholder between the single quotes. Please note the correct spelling. The HTML ID can also be inserted directly in the JavaScript code by placing the cursor in the JavaScript code in the correct position between the single quotes and then clicking on the correct field line in the form list. Next, the form fields that are to be expanded and collapsed must be entered. To do this, the HTML ID is inserted in single quotes in the area between the square brackets. The list can be extended as desired with commas.
Where do you find the correct HTML ID designation?
You can use the function "Insert HTML ID" to automatically enter the HTML ID in your Javascript command.
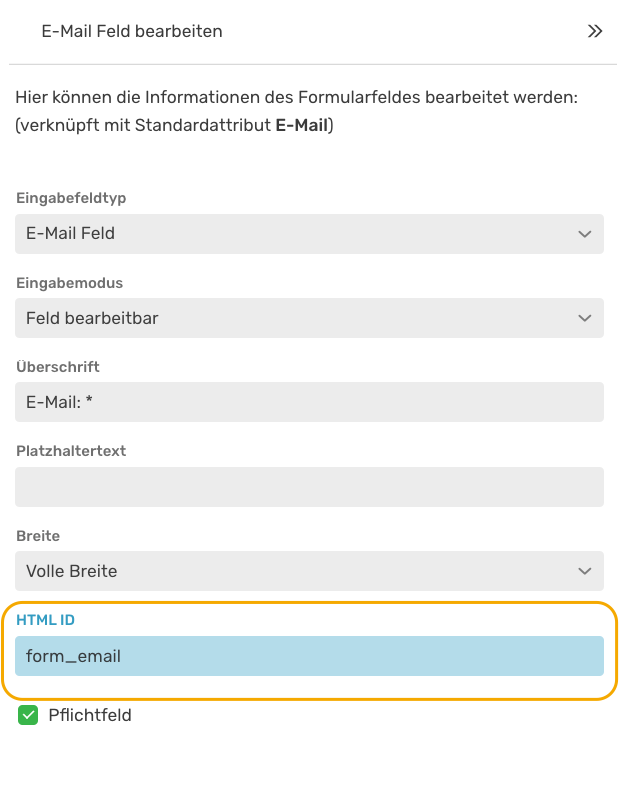
You can also find the HTML ID in the editing area of the respective attribute.
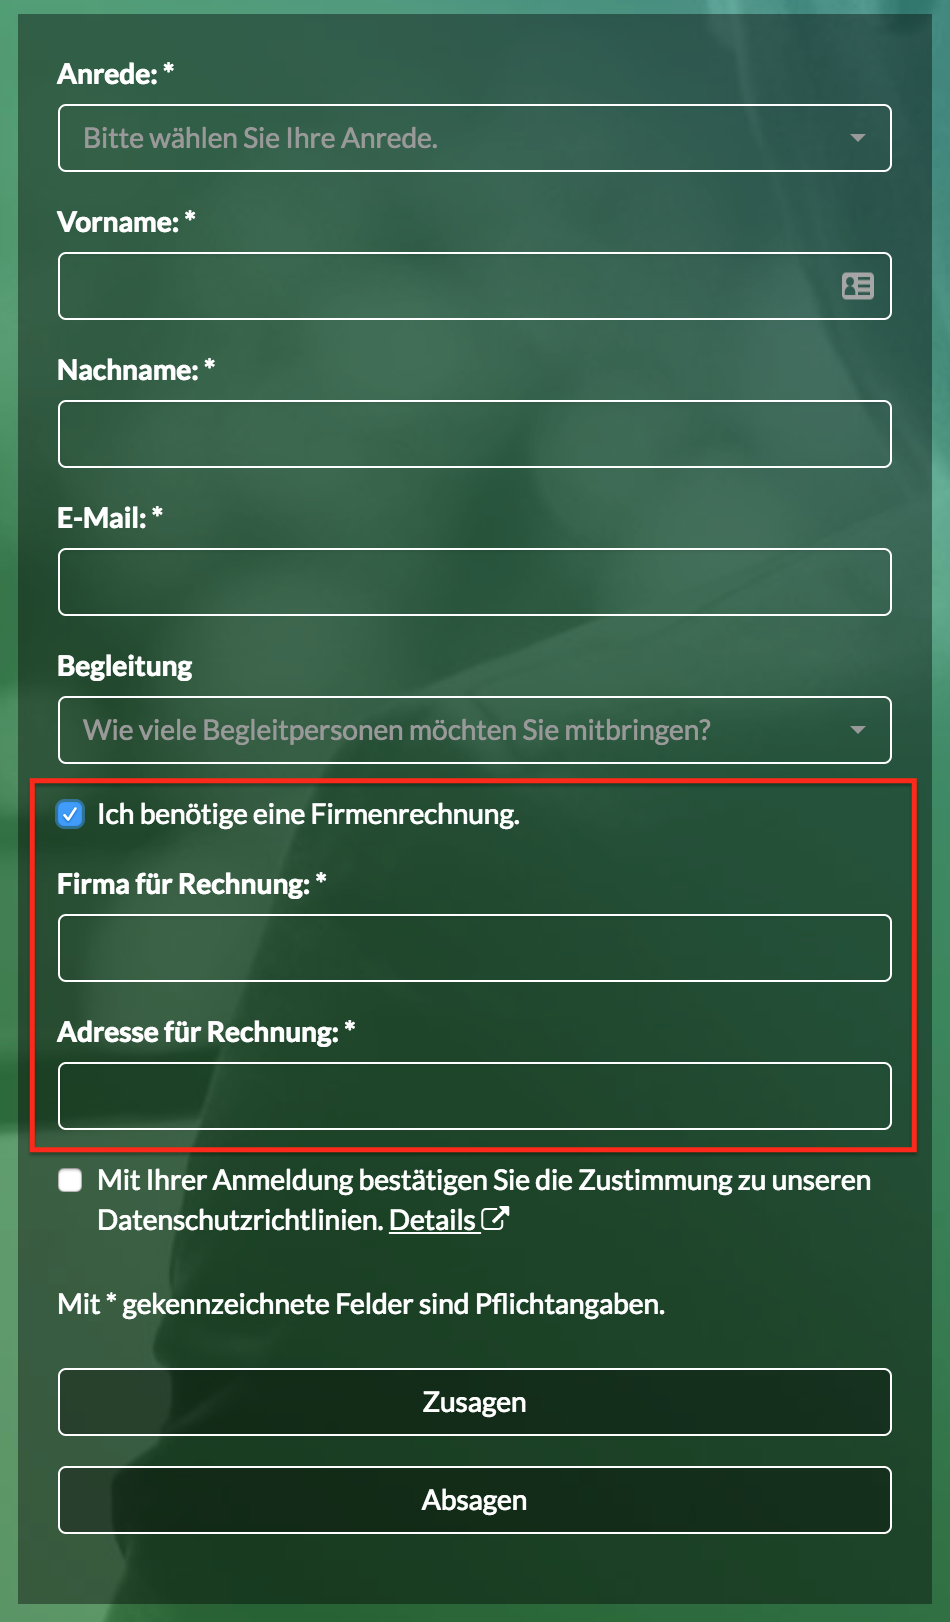
We would like to show this concretely using the example of an optional company invoice. For this purpose, the form is extended by a checkbox to request a company invoice and two text fields to request the company and the address. Then we insert the JavaScript code and enter the correct HTML IDs for the checkbox and the two fields.

The corresponding form on the website looks like this. After selecting the checkbox "I need a company invoice." both fields for the company and the address are automatically displayed.
Show and hide fields with a radio button or dropdown
Showing and hiding a selection after a radio button or dropdown works very similarly to a checkbox. You can also show and hide different information, for example text fields and a checkbox. We will take a closer look at this later in the example.
The following JavaScript code line must be inserted in the website generator in the module "Registration form" in the JavaScript section. However, the red placeholder HTML IDs must be replaced with the correct values and the value fields must contain values from the radio button / dropdown.
felderEinUndAusblenden('HTML ID RADIOBUTTON', '', ['HTML ID 1', 'HTML ID 2']);
felderEinUndAusblenden('HTML ID RADIOBUTTON', '', ['HTML ID 1']);
felderEinUndAusblenden('HTML ID RADIOBUTTON', '', ['HTML ID 2', 'HTML ID 3', 'HTML ID 4']);This code is very similar to the one for the checkbox. In addition, the value of the selection of the radio button / dropdown must always be entered. A line of code must be added for each value of the selection. Only the fields in the square brackets are displayed when the user selects them. All other fields are hidden. Please note that the value is entered exactly as it is noted in the form for the radio button / dropdown. Only the upper and lower case is irrelevant here.
Concrete example
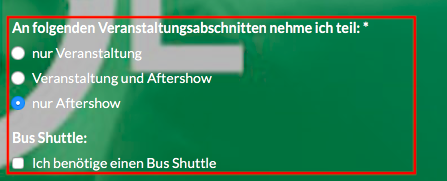
Your event consists of the actual event and an after-show party. You now want to ask your guests at the event whether they would like to participate in the event and the party or only in a part of the event. You can use a radio button selection for this:
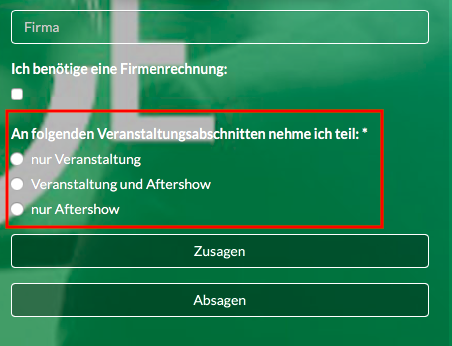
Depending on which event sections the guest attends, you may want to make further enquiries. The event includes a meal. For example, you could ask for food preferences for participation in "event only" and "event and aftershow". We assign the values "meat", "vegetarian" and "vegan".
As the party could go on until late in the evening, you would like to offer a free bus shuttle to all participants of the after-show party and would therefore have to include the request for the bus shuttle by checkbox.
Let us summarise:
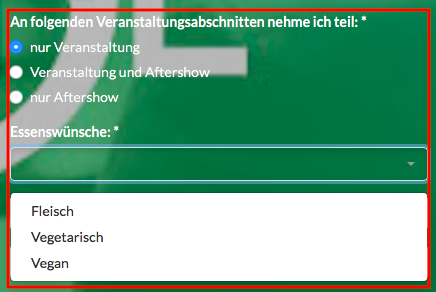
- Variant 1: Guest only comes to the event. Only the query for food preferences should appear (drop-down selection between meat, vegetarian and vegan).
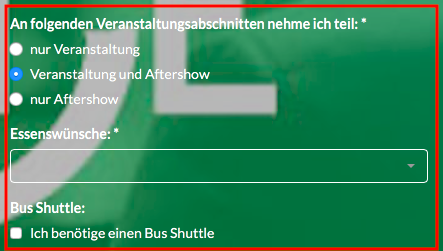
- Variant 2: Guest comes to the event and to the aftershow. Therefore, the dropdown query for the meal and the checkbox for the bus shuttle should appear.
- Variant 3: Guest only takes part in the after-show. Thus, only the request for the bus shuttle should be queried.
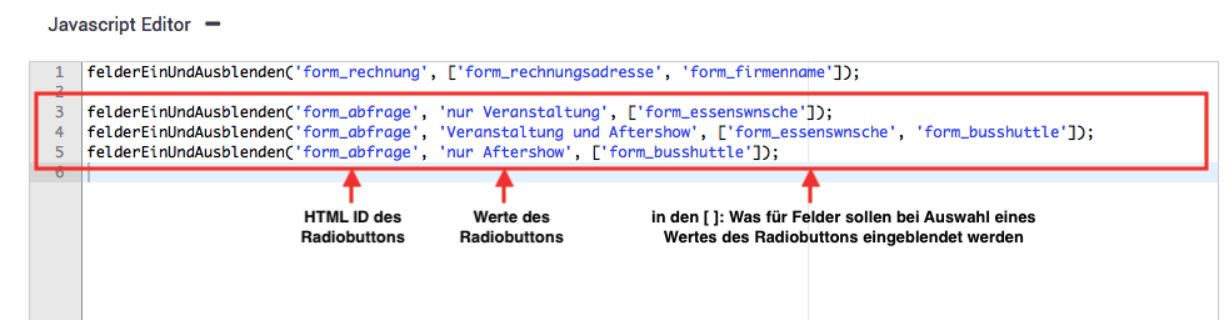
This is implemented in the Javascript Editor as follows:
In your registration form, the query appears as follows:
Participation in the event only:
Participation in the event and the aftershow:
Participation in the aftershow only:
Alternative option – use with mandatory fields
With a customized JavaScript command, individual hidden query fields can be defined as mandatory fields. To do this, all fields in the Form Builder are activated as optional fields.
To do this, simply add “AlsPflichtfeld” to the command.
felderEinUndAusblendenAlsPflichtfeld('form_select', 'option1', ['form_someField']);Here, the query field ‘form_someField’ would now automatically function as a mandatory field as soon as it was displayed with the selection ‘option1’.