Table of Contents
- 1. General account settings
- 2. Manage user profile and link a Zoom account
- 3. Create and change users
- 4. Create your own user roles
- 5. Create visibility groups
- 6. Commission own domain & email
- 7. Create account-wide guest fields
- 8. Enable AI Feature in Sweap
- 9. Create auto-delete rules
- 10. App Branding & Funktionseinstellungen
- 11. Devices for your on-site checkin
- 12. Create and use templates (emails and websites)
- 13. Publishing Package
- 14. Add interfaces / API
Administrator's guide to setting up your account
 Updated
by Ingo
Updated
by Ingo
- 1. General account settings
- 2. Manage user profile and link a Zoom account
- 3. Create and change users
- 4. Create your own user roles
- 5. Create visibility groups
- 6. Commission own domain & email
- 7. Create account-wide guest fields
- 8. Enable AI Feature in Sweap
- 9. Create auto-delete rules
- 10. App Branding & Funktionseinstellungen
- 11. Devices for your on-site checkin
- 12. Create and use templates (emails and websites)
- 13. Publishing Package
- 14. Add interfaces / API
Welcome to Sweap!
In order to be able to optimally adapt Sweap to your company's needs, we have compiled a guide for you.
Please go through the individual points step by step. Please note that some functions presented here are not included in all of our Sweap plans. Should there still be any uncertainties regarding the set-up and adjustment of your Sweap account, you are welcome to contact us via chat (weekdays, between 9 a.m. and 6 p.m.) through your Sweap account or by email to support@sweap.io.
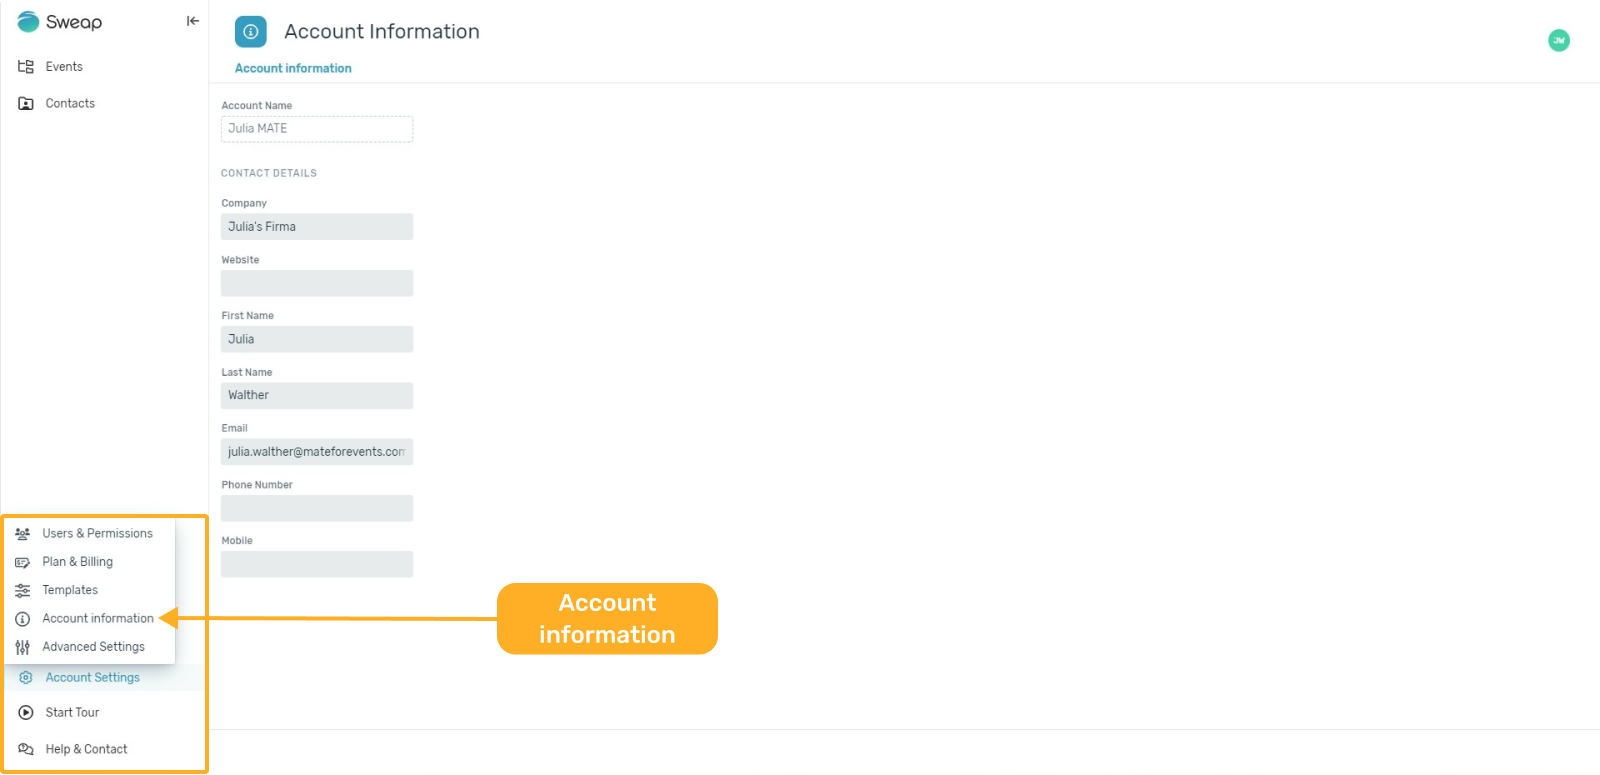
1. General account settings
To manage your account settings, open the 'Account settings' function on the start page in the web app - go to account information to change your account information if needed. As an admin, you can easily customise your account data (name, company, contact details).
2. Manage user profile and link a Zoom account
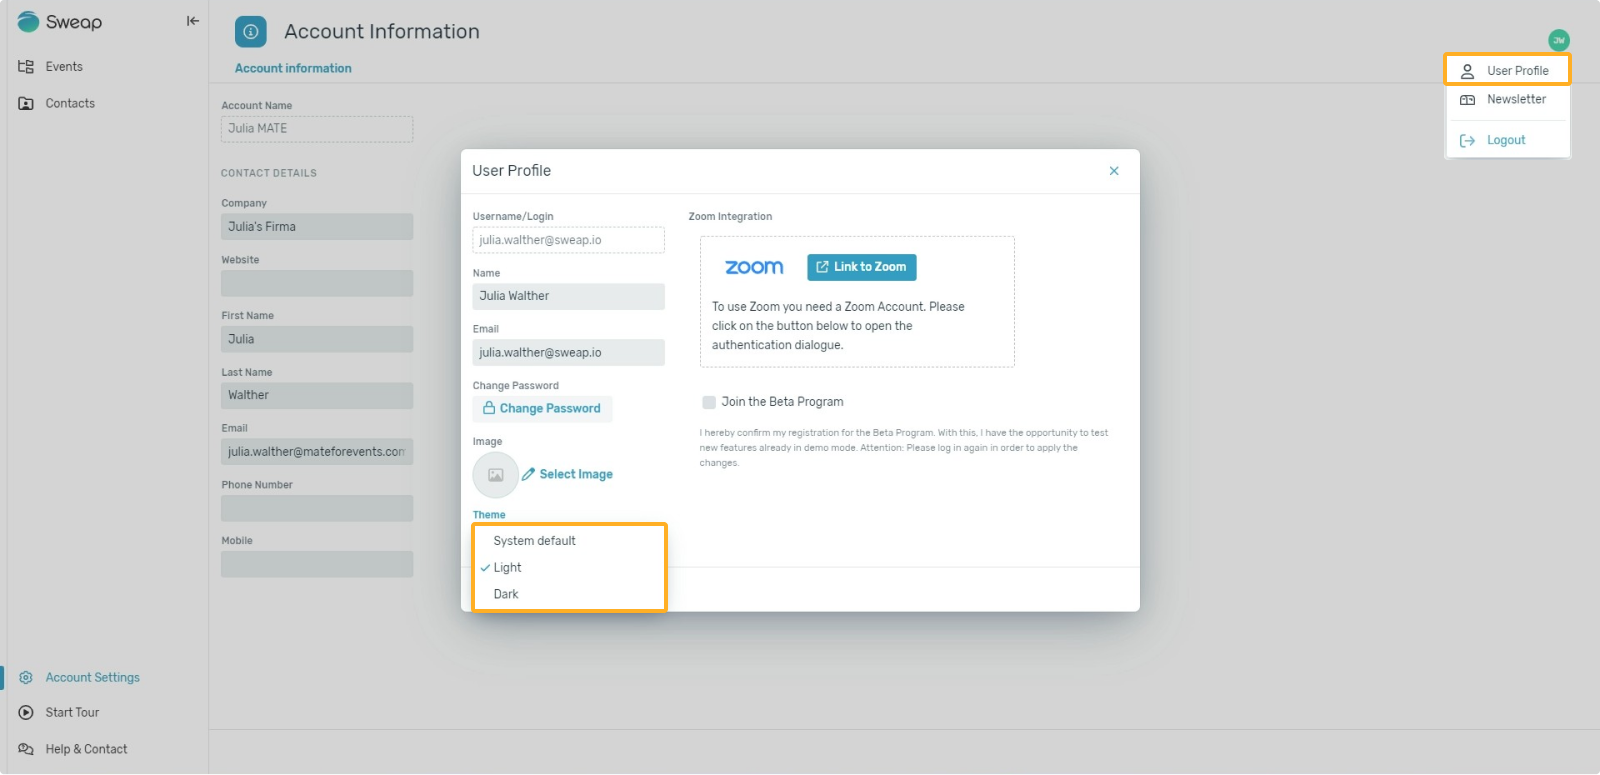
Sweap also allows you to link to a Zoom account. This is useful for connecting Zoom conferences in our Virtual Event Platform. Your guests do not need their own Zoom account or Zoom app to participate in the events. In addition, multiple Zoom Events can be offered simultaneously, allowing guests to easily switch from one event to another. To be able to integrate Zoom Events, you have to link your Zoom account in Sweap once. To do this, open your user profile in Sweap - click on the icon with your initials in the upper right corner. Now click on "User Profile".
Within the pop up you can change the following settings:
- Change your name
- Change your email address
- Change your password
- Upload a profile picture
- Setting the theme (you can find the 'dark mode' here)
Besides these settings/changes you will also find the possibility to link your Zoom account. Click on "Link to Zoom" and follow the instructions.
Detailed information on linking Sweap with Zoom can be found here.
3. Create and change users
As an admin, you can create new users. To create a user you assign the user name of the new user and enter the corresponding email address of that person you want to create an user account for. You can set a password directly and give it to the user or send an email to the user to let the user set a password on its own.
Furthermore you can deactivate users who should no longer have access to your account.
Further information on the user area can be found here.
4. Create your own user roles
We defined some default rules for you, administrator, standard user and app user. Information in regards to the default user roles can be found here.
With using our Enterprise plan you can also define further roles, that you can customise. You can then easily add the role to the respective user.
Further information about defining user roles can be found here. In addition to that you can check our article about user permissions and their functions.
5. Create visibility groups
The visibility groups feature allows users and events within a Sweap account to be assigned to one or more groups (e.g. divisions). This feature allows users with more than one group to access all authorised groups with only one user name. As an administrator, you have access to all visibility groups and events in order to maintain control at all times, and you can also add visibility groups yourself.
More information about visibilits groups can be found in this article.
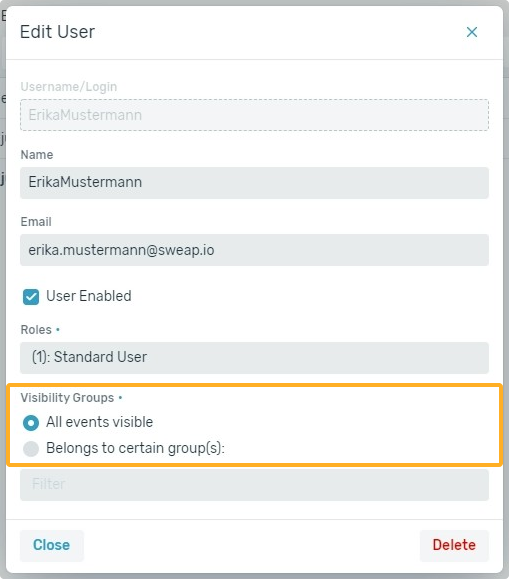
5.1 Assigning a user to a visibility group
Within the user settings, you can determine whether a user is assigned to one, several or no specific visibility group. If at least one group is not selected, the user can see all events of the account.
As soon as you have saved the change, the user is assigned to the selected visibility group and will only be shown the events of this group.
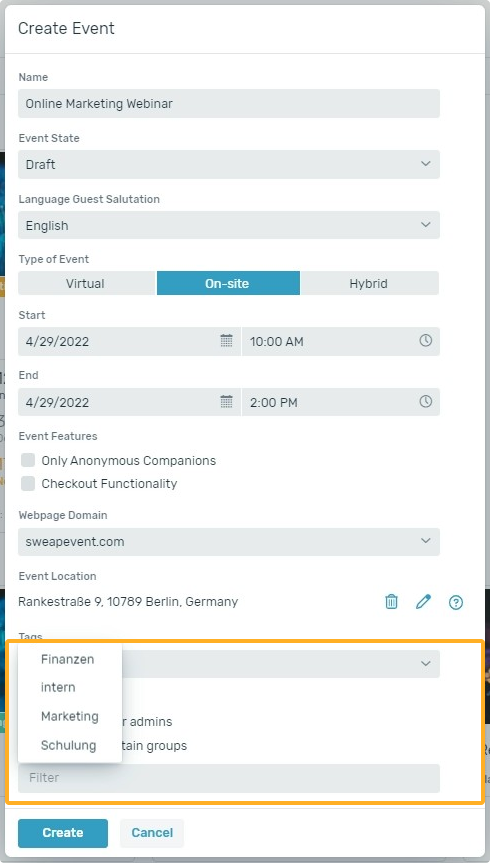
5.2 Assigning an event to a visibility group
Events can only be assigned to authorised groups. If a user is assigned to several visibility groups, he/she must select the group for which the event shall be visible while creating an event. Multiple selection is possible in order to grant access to several groups (divisions). Similar to the assignment of users, you can make this setting directly when creating an event or when editing an event. Further information on creating a new event can be found here.
6. Commission own domain & email
Sweap allows you to store multiple website domains and multiple sender email addresses within your account.
The easiest way to get your own domain and email you can use our form. If you need further email addresses or domains please get in touch with our support team support@sweap.io.
6.1 Website domain
We integrate the Sweap registration page (landing page) on our web server under your own domain or sub-domain.
The setup and hosting of the domain(s) is done by Sweap.
In preparation for this, your domain must be linked to custom-domain.sweap.io in the DNS with a CNAME (for a sub-domain e.g. www.example.org) or ALIAS / ANAME (for a root domain e.g. example.org).
Further information on domain setup can be found here.
6.2 Own email address
By default, Sweap has a stored sender eamail address that is used for sending emails:
mail@sweapevent.com
After creating new sender email addresses, you can access all the addresses stored in your account and select and use them for each event.
Emails are sent from Sweap via the European cloud mail service Mailjet and its SMTP server.
In order for Sweap to be able to set up a new sender address (via Mailjet), as a customer, please first inform our Sweap support team about the email address that you wish to use. In the next step, you will receive a confirmation via email from Mailjet, which will be sent to verify and authorise the new email address. Please forward this confirmation email to the Sweap support team (support@sweap.io) so that Sweap can confirm the link.
You can find more information about 'own email address' here.
7. Create account-wide guest fields
Sweap allows you to create account-wide guest fields. The guest fields are entered once and can then be used for all future events in your account.
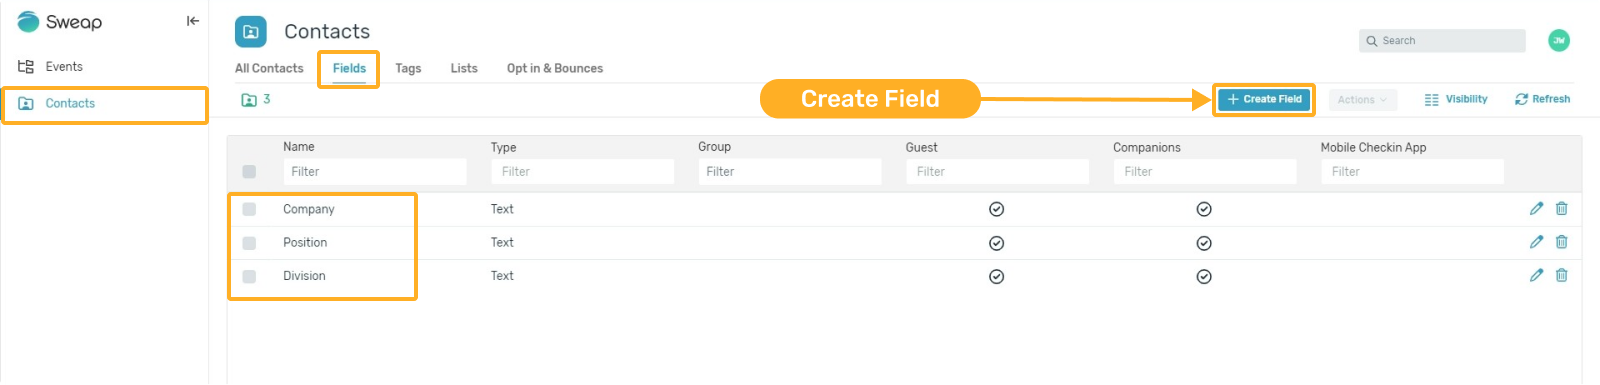
To create account-wide guest fields click on 'Contacts" and go to the 'Fields' area.
To create a account-wide guest field just click on the button '+ Create Field'. It's exactly the same way you can create guest fields within your event. Setting up guest fields within an event is explained in this article.
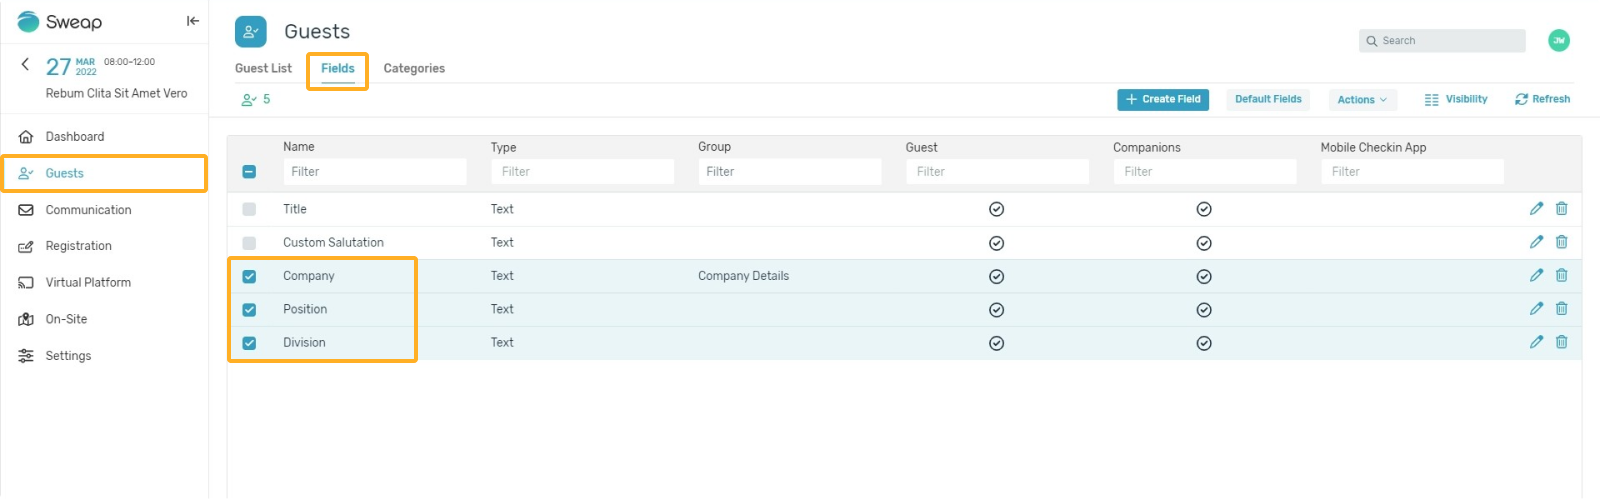
If a new event is created, the account-wide created guest fields are automatically enabled for this event - the are enabled in addition to the 'default fields'. You can easily check this in your event. Just go into the guests area and click on 'Fields'.
8. Enable AI Feature in Sweap
Our AI feature is an Artificial Intelligence (AI) tool designed to help you work more effectively with Sweap.
After activating our AI feature, it will be available to you at any place in Sweap where you find our HTML editor.
Since we will process data from you via a third-party provider when using the AI feature, we require your consent to use the feature. This consent is given at the account level and is therefore valid for all users of the account. Currently, there is no differentiation between user accounts, so that the feature is either activated or deactivated for the entire account.
The settings for use can be found in the Account Settings under 'Advanced Settings'.
You can find the setting there in the first tab under "AI Feature".
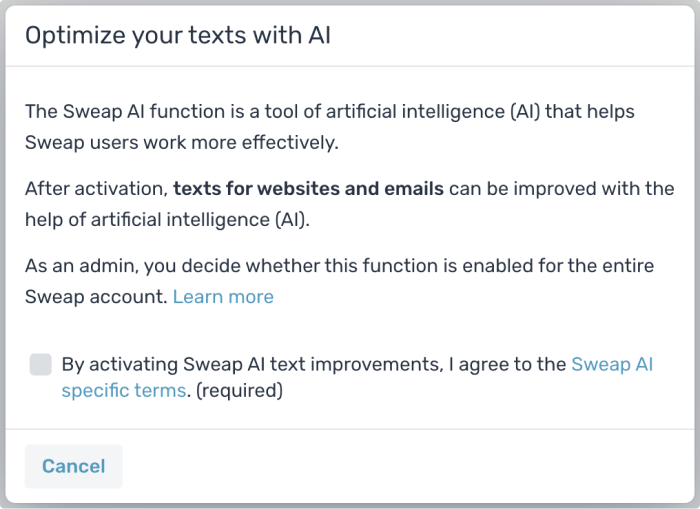
Here, the admin of the account can activate or deactivate it. We have also stored the specific AI conditions for use here, so that they can be viewed. You have to agree to use them.
Everything you need to know about using the feature in your events can be found here.
All questions about data protection and data security when using the AI feature can be found here.
9. Create auto-delete rules
With the auto-delete rule feature, you can control when and which guest data of your event(s) should be deleted automatically.
What's the benefit?
By deleting specific data, you do not have to delete the entire event. You can still access selected data and statistics of the respective events. Furthermore, you can determine at which point in time (depending on the start or end date of the event) the automatic deletion should take place.
To create Auto-Delete Rules you go into your account settings and click on 'Advanced Settings'. In the are 'Auto-Delete Rules' you can set up your rule by clicking on the button '+ Create Auto-Delete Rule'.
9.1 Settings for auto-delete rules
Excluded Default Fields
You can specify which data (default fields) should be excluded from deletion.
Excluded Fields
You can specify which data (beyond the default fields) should be excluded from deletion.
Retention period starts from
You decide whether the start or end date of the event should be used as the basis for calculating the deletion date.
Duration of the retention period (in days)
The duration of the retention period states how many days after the start or end date the data should be deleted.
Automatically archive event after execution
If you check this box, your event will be archived automatically after the rule is executed.
Once you have created a rule, you can set it as the default rule.
Check this article to get more information about auto-delete rules.
10. App Branding & Funktionseinstellungen
Sweap offers the possibility to use your own corporate design in the check-in app. This way you can quickly and individually customize the colors and the logo of the app. You have the possibility to customize your check-in app account-wide. With the account-wide setup the app settings do apply to all your events - if changes are neccessary for a specific event you can make your changes within the event to only design the app lool for the speific event.
10.1 Customize Checkin App account-wide
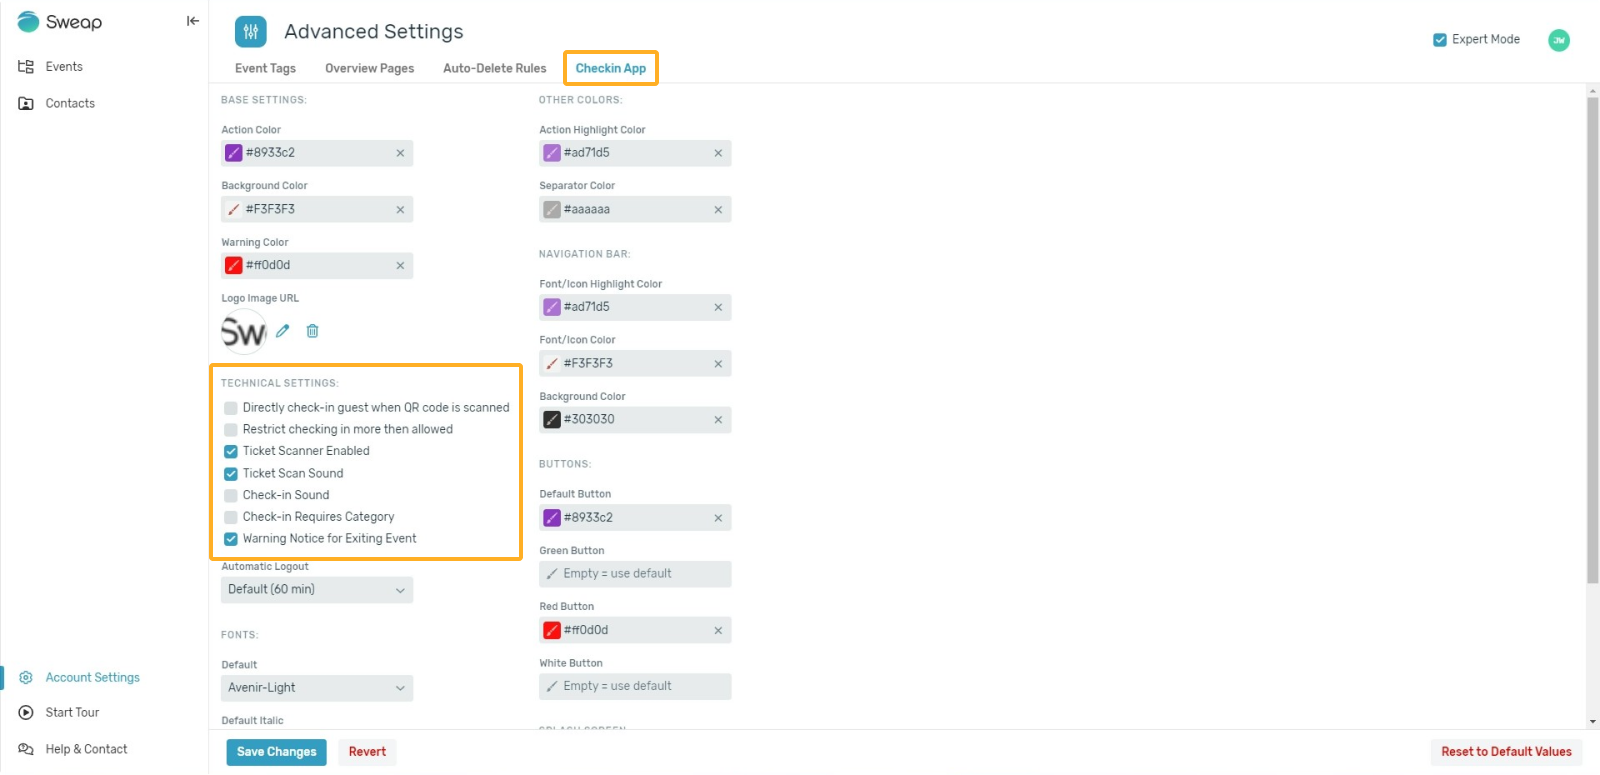
To set up your app account-wide navigate from your Sweap dashboard to the Account Settings. Click on 'Advanced Settings' and switch to the area 'Checkin App'.
10.2 Customize Checkin App within event
To set up your event for a specific event, go to the desired event and navigate to the menupoint 'On-Site', click on 'Checkin App Configuration' to set up the app in the way you want it to look for that event.
10.3 Checkin App configuration
There is two modes within you can make changes to the checkin app setup, default mode and expert mode.
Settings that you can change within the default mode are:
- Action Color (Color of the action fields, e.g. 'Search', 'Open', 'Camera')
- Background Color (Background of the app)
- Warning Color (Display of warnings)
- Logo Image (es shown within the app in the right botton area)
These adjustments are usually enough to make the checkin app appear in your corporate design. In the expert mode, you can make further settings (fonts and colors) as well as functional settings for your checkin app. You can activate the expert mode by checking the box in the upper right corner.
More information about app branding can be found here.
11. Devices for your on-site checkin
For on-site checkin you need mobile devices (iPad, iPhone). Additionally, it is possible to connect a Bluetooth/wireless LAN label label printer with the iOS device. To be flexible, we recommend wireless LAN hotspots equipped with a SIM card. So you are not dependent on a wireless LAN.
11.1 Recommended devices
If you are having a lot of on-site events it pays off to have your own devices.
Following devices can be recommended:
- Apple iPad Mini (latest generation), 'Sweap guestlist' app (at no charges in Apple AppStore)
- Brother label printer QL-820NWB (optionally portable available with battery)
- mobile hotspot TP-Link M7650 (or newer version)
We use 2GB SIM cards, which are perfectly sufficient for using Sweap. As long as you use internal Wi-Fi without exception, the hotspot is not absolutely necessary.
To get more information about printers that can be used, read this article.
11.1.1 Leasing devices
If you have no own devices or need more devices that you store you can lease devices from us. Devices that we rent are allways pre-configured which means that you only need to unpack and plug them to get everything started.
Following devices setups can be ordered:
- Printer setup - contains iPad mini, label printer from Brother, hotspot or mobile router incl. SIM Card and a role printing material (standard name labels, type DK-11209)
or - Apple iPad mini (single device) for on-site checkin without printing labels
Our service provider delivers the hardware to the desired delivery address and also picks it up afterwards.
11.1.2 Configure your own devices
You can also purchase and configure the devices yourself.
You can download the Sweap guest list application free of charge from the Apple App Store. After downloading, you can log in with your access data and start directly.
Depending on the model, the label printer must be connected to the iOS device and the print function must be activated in your account in advance. You can find out how to activate the print function and set up the hardware setup in the following articles.
12. Create and use templates (emails and websites)
Templates help you and your users to set up emails and web pages even faster, while keeping corporate design in mind. You can set up as many templates as you like. Templates already contain fill values, such as the logo or your main color. These settings can be invisible if required, so that replacement / deletion is no longer possible.
To get started quickly, we recommend that you create an event according to your wishes with at least one email and a web page in raw form (without event content). You can then easily generate templates from this event. You can find out how to do this here.
Of course, you can also create different emails and web pages if you need more than one template. All information remains visible and thus changeable, but can also be "hidden" if necessary.
Create a new event and name it, for example, SAMPLE EVENT - PLEASE DUPLICATE. Set the date far into the future so that it is always displayed at the top of the overall view. Now create frequently used attributes, categories, emails and for example the wallet as well as the website with form once completely in accordance with your organization. Then your users can use this event as a template by simply duplicating the event and copying all settings. Always keep a copy of your template under the visibility group "Administrator" to prevent possible accidental changes by your users.
13. Publishing Package
With Publishing Package we mean the possibility to display your events on an event overview page. In addition, tagging of events is available, which is a filter function for visitors on the event overview pages. The event overview offers you the possibility to display events on your website in a simple way so that your visitors can find them.
If you need more than one event overview page, this is possible with our "Publishing Package Plus". With this feature you can integrate as many independent event overview pages as you like. You then decide which event is published on which overview. The whole thing is controlled by visibility groups and / or tags. If you are interested, please contact your Customer Success Manager or support@sweap.io.
13.1 Implementing event overview page in your website
The integration is done via a JavaScript client, which we already provide. You only have to include the HTML code on your website and insert your unique key. For the integration and customization, only a little HTML and CSS knowledge is needed. You can find out how it works here. Alternatively, you can use the REST interface to retrieve and process event information in JSON format.
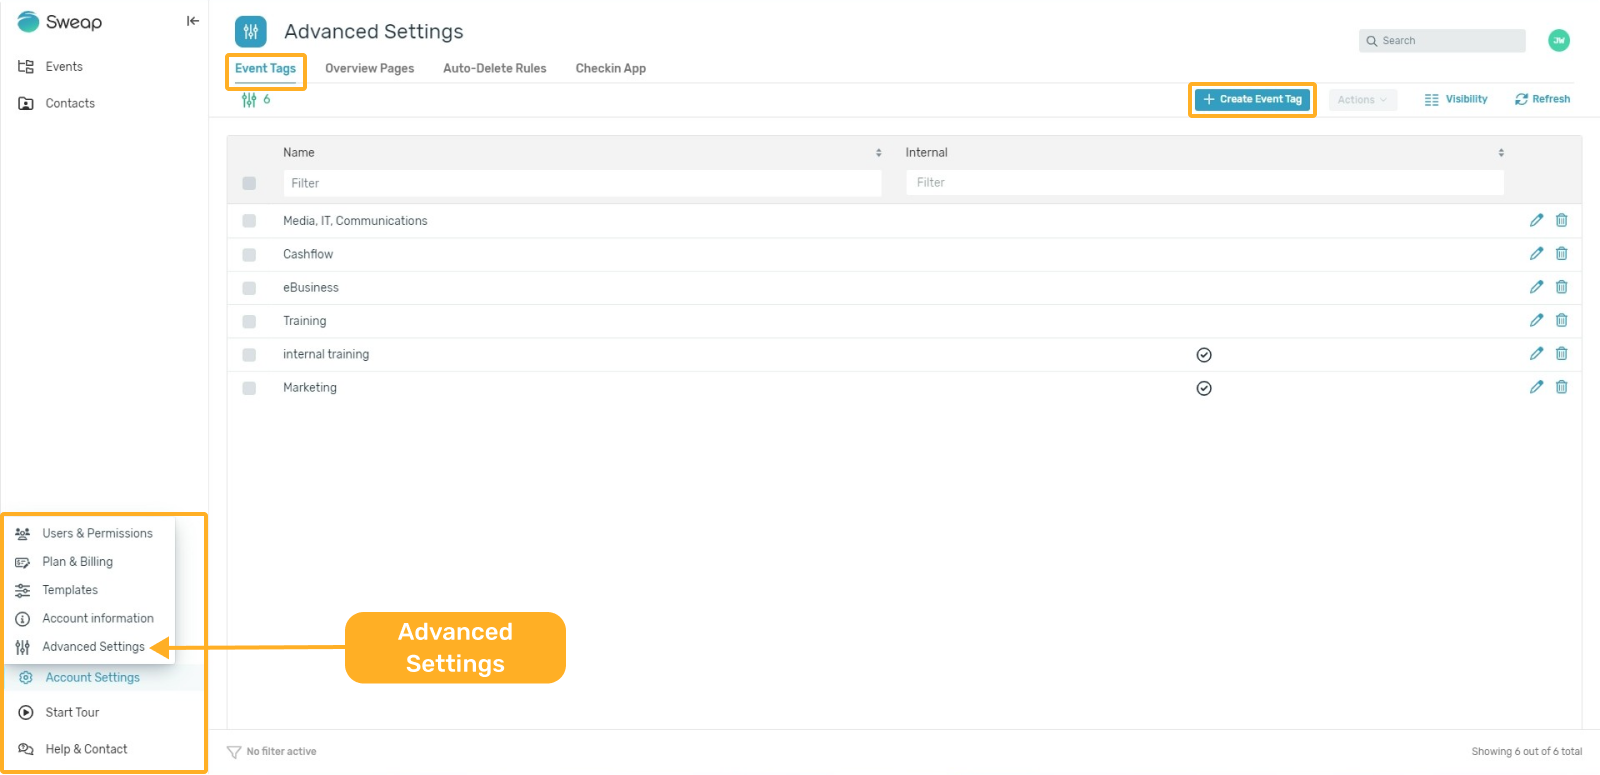
13.2 Create and use event tags in your account
Tags help you to segment and tag your events. External tags are displayed on your event overview page as a filter option for your visitors. They can then, for example, filter by specific areas of interest (tags). You can use internal tags to assign specific information to your event, for example, the editor. This gives you a new filtering option.
To create event tags go to 'Account Settings' and click on 'Advanced Settings'. Within the area 'Event Tags' you can now create your tags. Just click on the button '+ Create Event Tag' to set up the desired event tag. You can create as many tags as you want.
Once the tags are created in the account, you can now tag events. You can find this setting either when creating a new event or under the settings within the event. You will find the selection in the dropdown menu under Tags. Changes are possible at any time.

14. Add interfaces / API
Sweap provides you with an HTTP REST JSON interface. The interface offers the following functions, among others:
- mass import of guest data
- read, create, change, and delete guest data
- read, create, change, and delete event data
- access to an event overview
- connection to a registration page
API documentation and access to the interface for testing can be provided upon request. Please contact your Customer Success Manager or the Sweap support team support@sweap.io.