Table of Contents
- Set up email
- 1. Email type and template
- 2. Sender Informationen
- 3. General Design
- 4. Header
- 5. Main Area
- 6. Call to Action Area
- 7. Virtual Event
- 8. Social Media
- 9. Footer
- 10. Invitation Preferences
- 10.1 Activate registration form
- 10.2 Activate direct acceptance from email
- 10.3 Activate direct declining from email
- 10.4 Register Page Selection
- 11. Additional Options
- 12. Email Testing and Finalization
Configure emails - set up an invitation email
 Updated
by Julia Walther
Updated
by Julia Walther
- Set up email
- 1. Email type and template
- 2. Sender Informationen
- 3. General Design
- 4. Header
- 5. Main Area
- 6. Call to Action Area
- 7. Virtual Event
- 8. Social Media
- 9. Footer
- 10. Invitation Preferences
- 10.1 Activate registration form
- 10.2 Activate direct acceptance from email
- 10.3 Activate direct declining from email
- 10.4 Register Page Selection
- 11. Additional Options
- 12. Email Testing and Finalization
The following example presents the configuration of an invitation email using the LA LUNA template.
To create an email, go to your event.
You can create an email from the dashboard or go directly to the communication section and start creating your email from there.
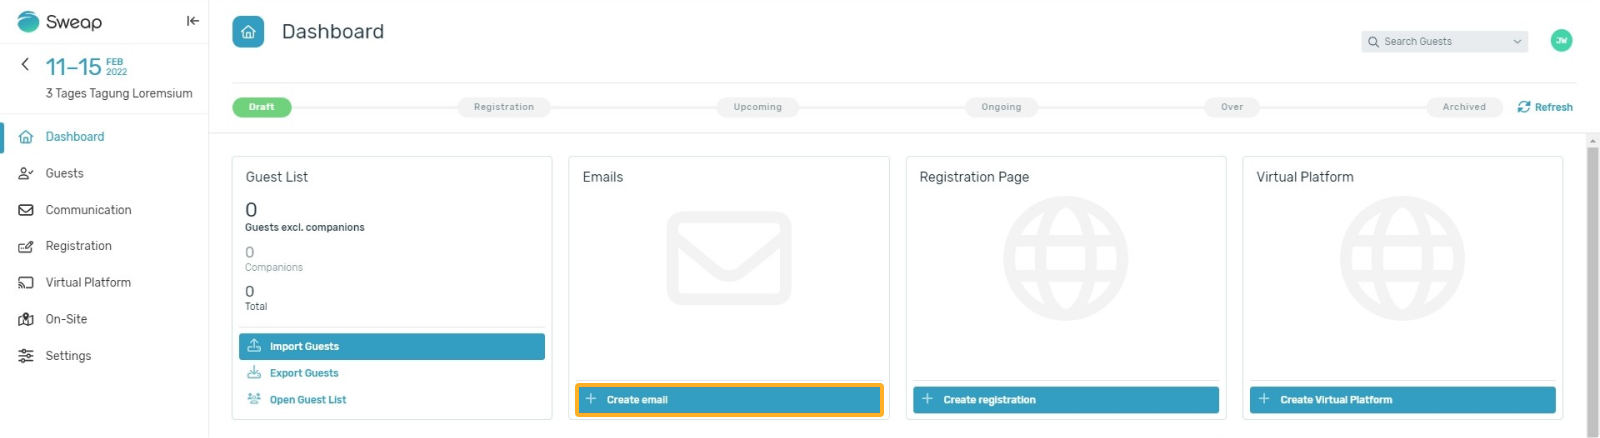
Create your email from the dashboard
Click on '+ Create email' in the dashboard. This button will take you to Sweap's email builder, where you can set up your email.
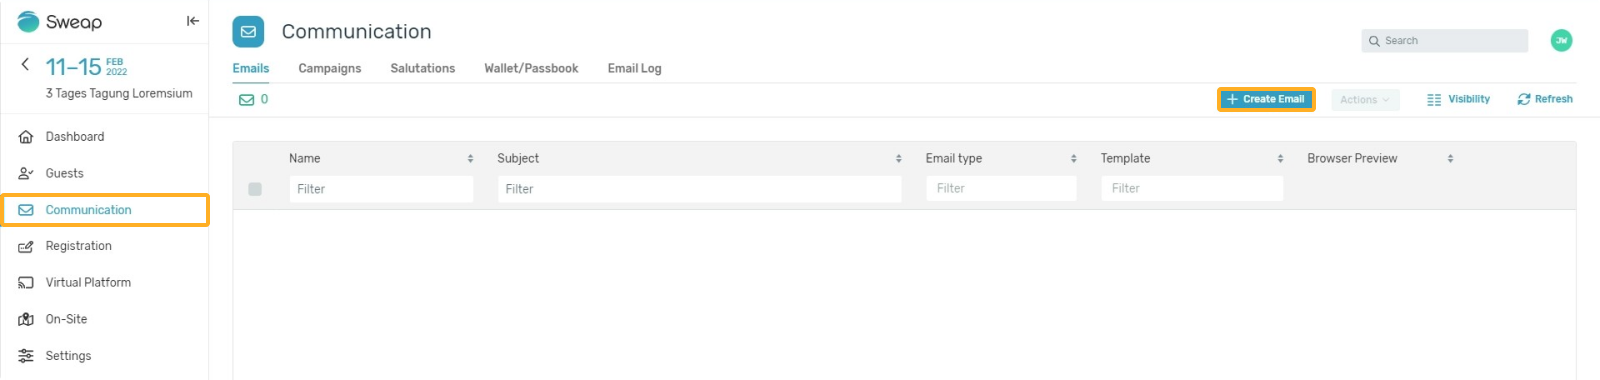
Create email within the communication section
Click on '+ Create Email' in the 'Communication' section. This button will take you to Sweap's email builder, where you can set up your email.
Set up email
To create your email, simply follow the steps in our system. You will find the menu of our email builder on the left side. In the different sections you can enter all the information you want to send to your guests.
You can find our preview function in the upper right margin ("Show preview"). With this function you can always see how your email would look like. Especially if you are still at the beginning of creating your own emails with Sweap, the preview function will be a great help. With the help of the preview you can easily see where the changes you have just made are visible within your email.
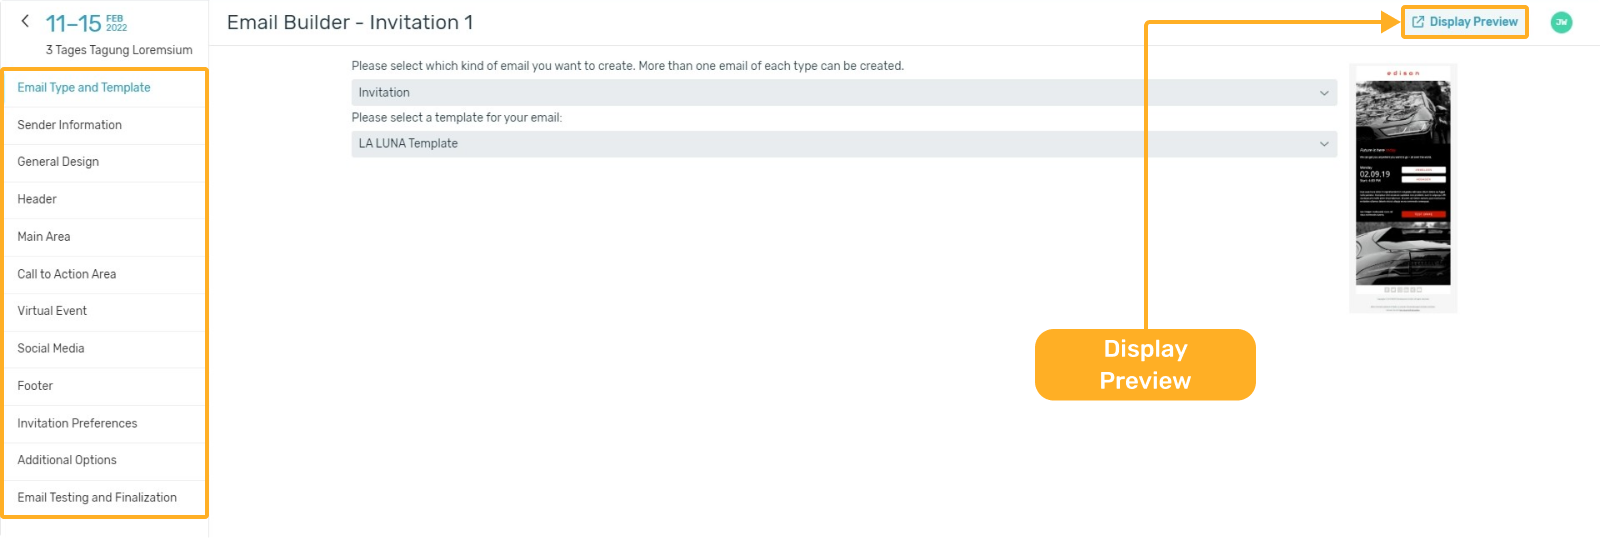
1. Email type and template
In the first step you need to select the email type and the email template that you want to use. In our example, we set up an invitation email, accordingly we select the type 'Invitation'.

Since we want to build our invitation using the LA LUNA template, we will use this template accordingly. If you have created your own templates for your events, you can also use these templates. More information about custom templates can be found here.

2. Sender Informationen
Within the next step you define the sender information:
- Email Subject
- Sender Name
- Sender Email Address
- Reply Email Address
- BCC Email Address
3. General Design
In the next step you define the general design of your email. Define your color scheme here to give your email the look that matches your corporate identity. Here you can define the general design settings for the following items:
- Primary color / Corporate Identity (CI) color
- Background color
- Outer background color
- Text color
Take a look at the preview to see what you changed. This will give you a direct overview of which area is meant by its name.
4. Header
Next you can design the header section of your email.
You can insert a preheader here. The preheader is a teaser text that is usually displayed below the subject in the preview of an email. It is used to give the recipient a first insight into the content. The usage of preheaders can increase the opening rate of your emails.
Additionally you can upload your logo. You can decide whether you want to display your logo on the left, in the middle or on the right. You can also upload a header image here.
When uploading images it is important to respect the recommended image sizes, these are optimal for the different email clients. You can find our advice on image sizes by clicking on the small circle with the question mark. More information about the image sizes that you can use in Sweap can be found here.
5. Main Area
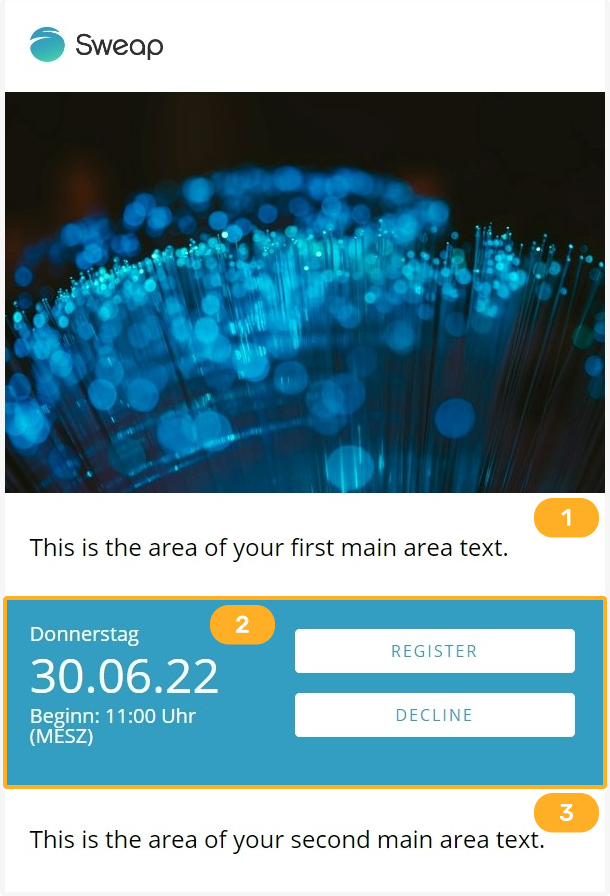
In the main area you can store all your relevant information. For this purpose, you can use two text fields that you can fill with our text editor (1 and 3 in the image). You have various formatting options available here. You can find useful information about our HTML editor here.
In addition to the two text fields, you can also define the action field area (2 in image). In invitations and invitation reminders, you can give your guests the option of accepting or cancelling an event in this area. You can also freely define the display of the date - the left side of the action field area can be individually filled with content. For confirmation emails, you can add the QR code of your guest in the action field area.
If you don't need this area you can easily hide tthe action field area.
6. Call to Action Area
The Call to Action Area is a separate area below the main area.
With the Call to Action area you have the possibility to provide your guests with further information by clicking on a button.
There are two ways to setup the button within the call to action area:
- On the one hand you have the possibility to place a URL directly. Simply insert the desired URL into the field.
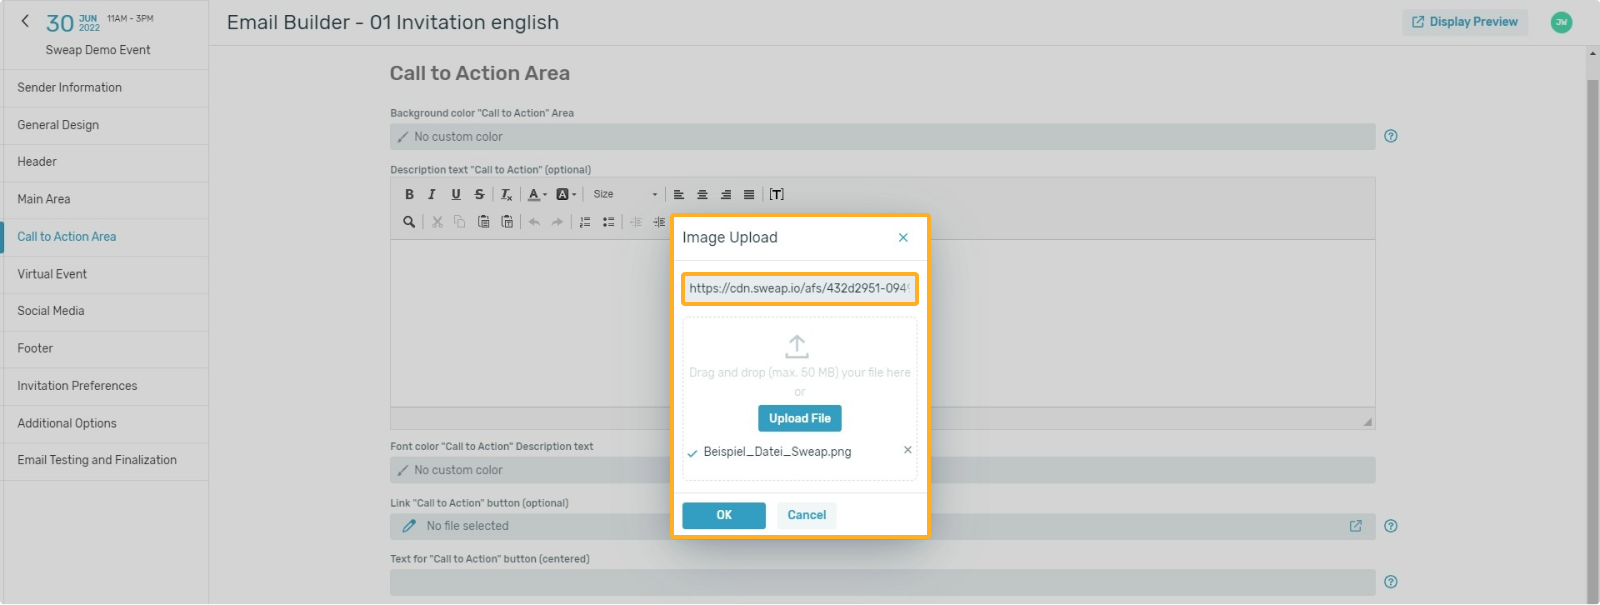
- On the other hand you have the possibility to upload a file. By clicking on the pencil icon, the upload dialog window opens and you can upload your desired file.
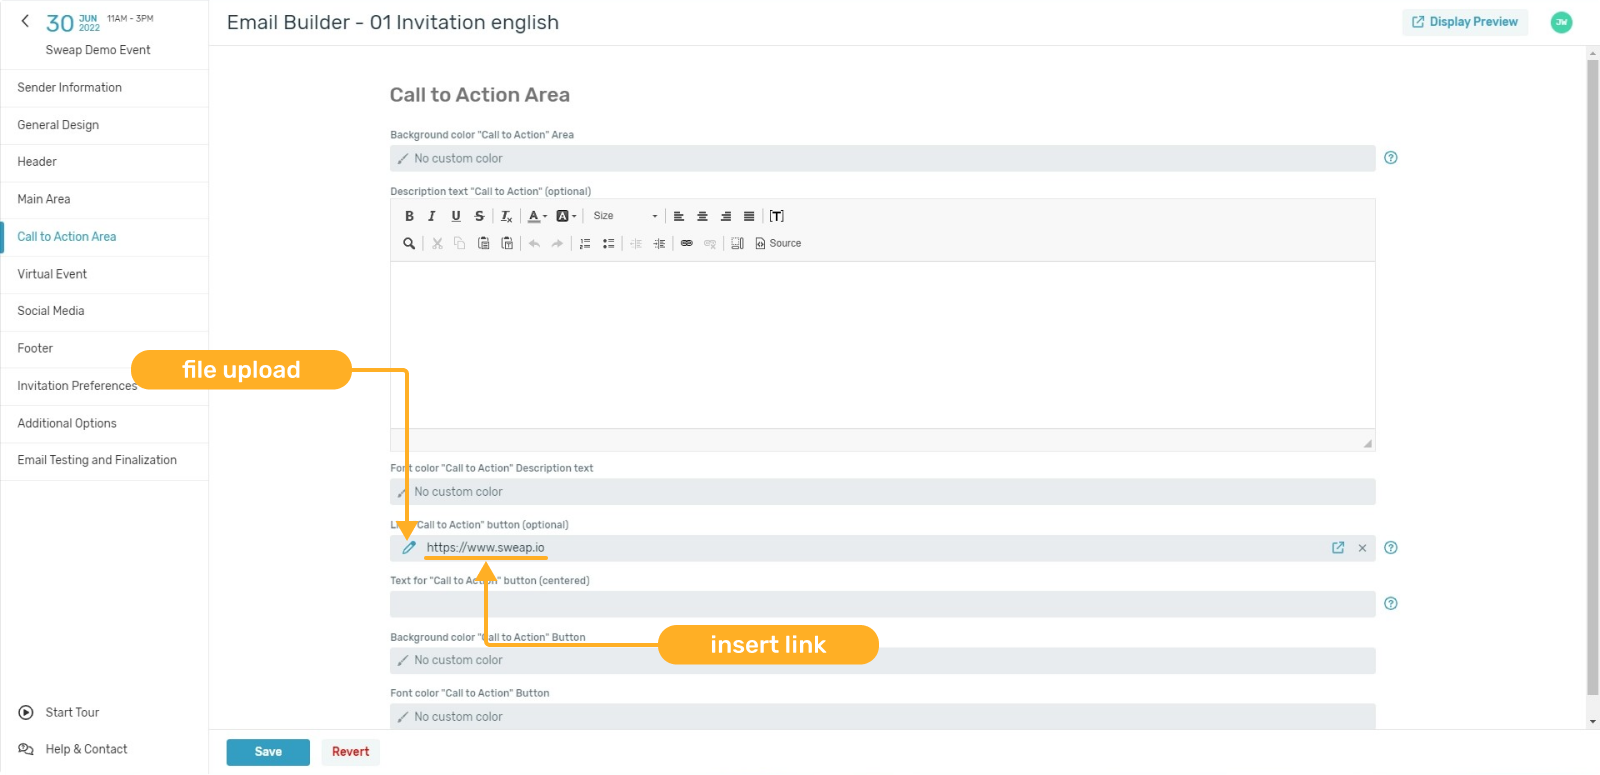
You can only implement one button in the call to action area - but if you want to make additional content available for your guests, you can use a simple trick here.
In this case, simply use the upload dialog window, upload a file and do not save this process, but copy the URL that was created by the upload. You can now use this URL as a hyperlink in your body text - so you have the possibility to provide further documents for your guests.
7. Virtual Event
In this section you can insert a link to a virtual event. If you do not fill this area, it will not be displayed in your email.
If you fill the area, you create another another button, the virtual event button. This button will be displayed below the call to action button.
8. Social Media
Link your social media appearances in this area. Currently you can add the following social media links to our system:
- YouTube
9. Footer
Within the footer you can communicate further information to your guests.
Information that should always be stored here are your imprint and your privacy policy - link both via hyperlinks with the information on your website.
In addition to this information, you can also add a footer image, which will then be displayed within your email.
10. Invitation Preferences
Within the invitation settings, you can define how your guests can respond to your event from your invitation email.
The following variants are available to you:
- Activate registration form
- Activate direct acceptance from email
- Activate direct declining from email
10.1 Activate registration form
By activating this function, the guest will get to your registration page by clicking on the registration button and will find the corresponding registration form there. The guest can now make his entry and register for your event by submitting the form.
10.2 Activate direct acceptance from email
If you activate the acceptance directly from the email, you will still redirect your guest to your registration page, but no registration form will be displayed. The guest will not be able to enter any further information. Your guest only has to agree on the registration page within a pop-up window that he wants to register for your event.
This is necessary to prevent unwanted acceptance or rejection by automatic spam checks.
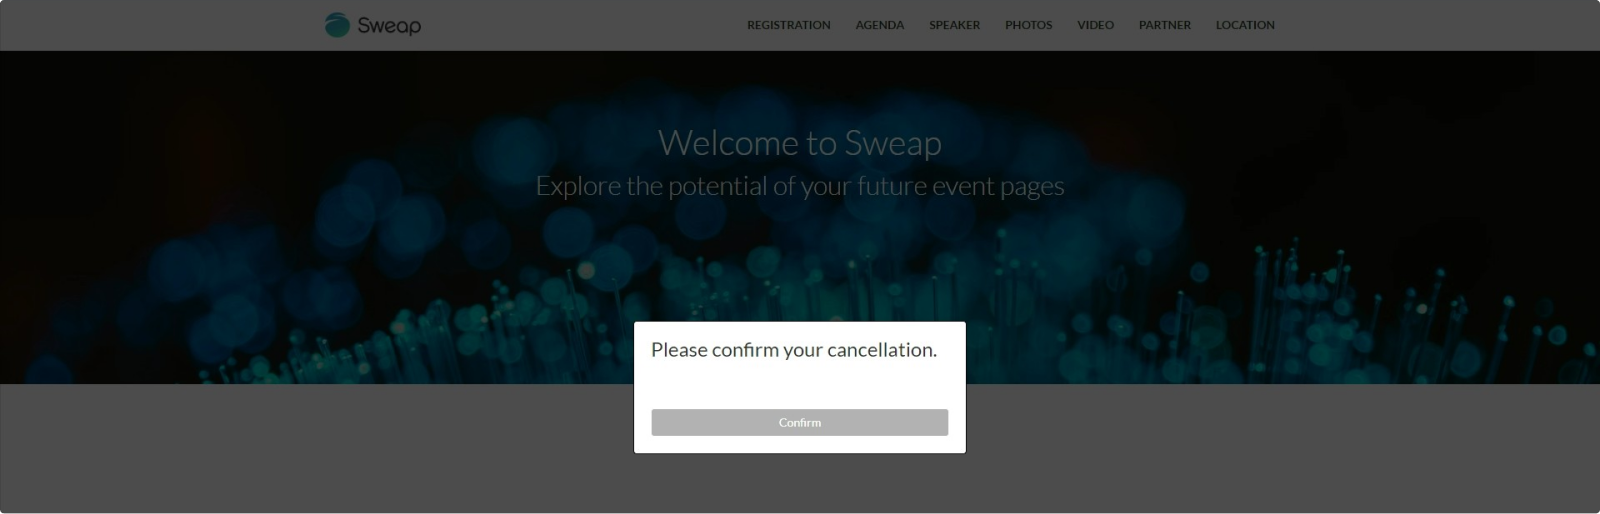
10.3 Activate direct declining from email
In terms of cancellations, it is recommended to activate the cancellation directly from emails. This function takes your guest to your registration page via the 'Decline' button, where they must confirm within a pop-up window that they wish to decline their registration for your event. This is necessary to prevent unwanted registration or cancellation by automatic spam checks.
If you disable this feature, the guest will have to fill out your registration form to unsubscribe from your event. It can be assumed that this extra effort is only done by a few guests, which would worsen your feedback rate. We therefore recommend activating the direct unsubscribe from the email.
10.4 Register Page Selection
Since you send your guests to a registration page with your invitation email, you can define within the invitation settings on which registration page your guests should land.
This feature is relevant if you need to create multiple registration pages. This scenario can occur if you divide your guests into different segments.
For example, you want to invite your guests in different languages. In this case you can create a German and an English registration page. At the same time, you can also create your emails in multiple languages.
By default, our system always links to the registration page that you have defined as the "default page".
11. Additional Options
In this section you can activate if and how you want to send an iCalendar file to your guests. You can attach the iCalendar file to your email and/or include a link in the email. Via the iCalendar file your guests have the possibility to save the calendar entry comfortably in their calendar (e.g. Outlook, GoogleCalendar, AppleCalendar etc.).
12. Email Testing and Finalization
In the last step, you have the option to set a name for your email. Furthermore, you can activate the tracking of the opening rate of the sent emails here.
You can also make a language selection here. This language selection controls in which language information such as the ticket, iCal, Wallet, etc. is displayed.
You can select between
- Event Language
- German
- English
Last but not least, you can send out a test email. To do this, click the "Test" button. A dialog window will open, where you can configure the test options.
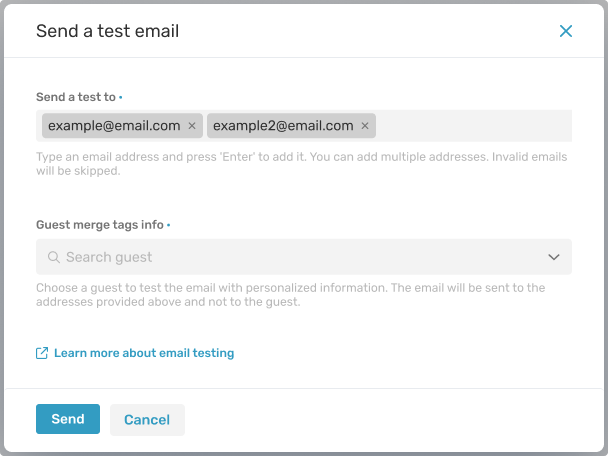
You have the option to send your test email to multiple recipients at once. Simply enter the desired email addresses into the designated field, and confirm each email address by pressing the Enter key.
Within the second step you to select a guest from your list whose data will be used to fill the Liquid placeholders. Alternatively, you can use one of our provided test guest data sets. All recipients of the test email will see the message as if it were specifically personalized for the selected guest.
You can find out more about sending test emails here.
After you have made all settings for your email, don't forget to save it. Your email is now successfully created and can be sent.