Table of Contents
- General basic functions
- Module
- Social media links
- Header
- Countdown
- Text box (only in the Advanced and Complete templates)
- Programme/Agenda (only in the Advanced and Complete templates)
- Speaker (only in the Advanced and Complete templates)
- Picture (right)/ text (left) and picture (left)/ text (right)
- Picture slideshow (only available in the Complete template)
- Video (only available in the Complete template)
- Partners/ Sponsors (only available in the Complete template)
Contents and modules of a registration page
 Updated
by Ingo
- General basic functions
- Module
- Social media links
- Header
- Countdown
- Text box (only in the Advanced and Complete templates)
- Programme/Agenda (only in the Advanced and Complete templates)
- Speaker (only in the Advanced and Complete templates)
- Picture (right)/ text (left) and picture (left)/ text (right)
- Picture slideshow (only available in the Complete template)
- Video (only available in the Complete template)
- Partners/ Sponsors (only available in the Complete template)
General basic functions
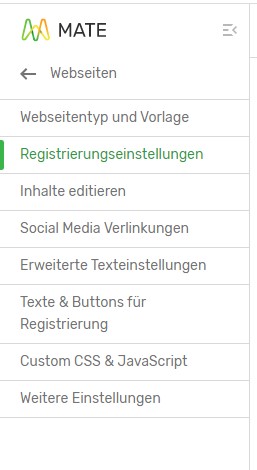
Menu bar
You can navigate through the individual configuration modules using the menu bar on the left-hand side.
Preview function
You can use the general preview function at any time to check the current editing status of your website(s). You do not have to save the changes you have made beforehand.

Module
Social media links
In this module section you have the possibility to link your social media accounts. Simply insert the desired link to the individual channels. You can link your Facebook, Twitter, Instagram, YouTube, XING or LinkedIn account here.
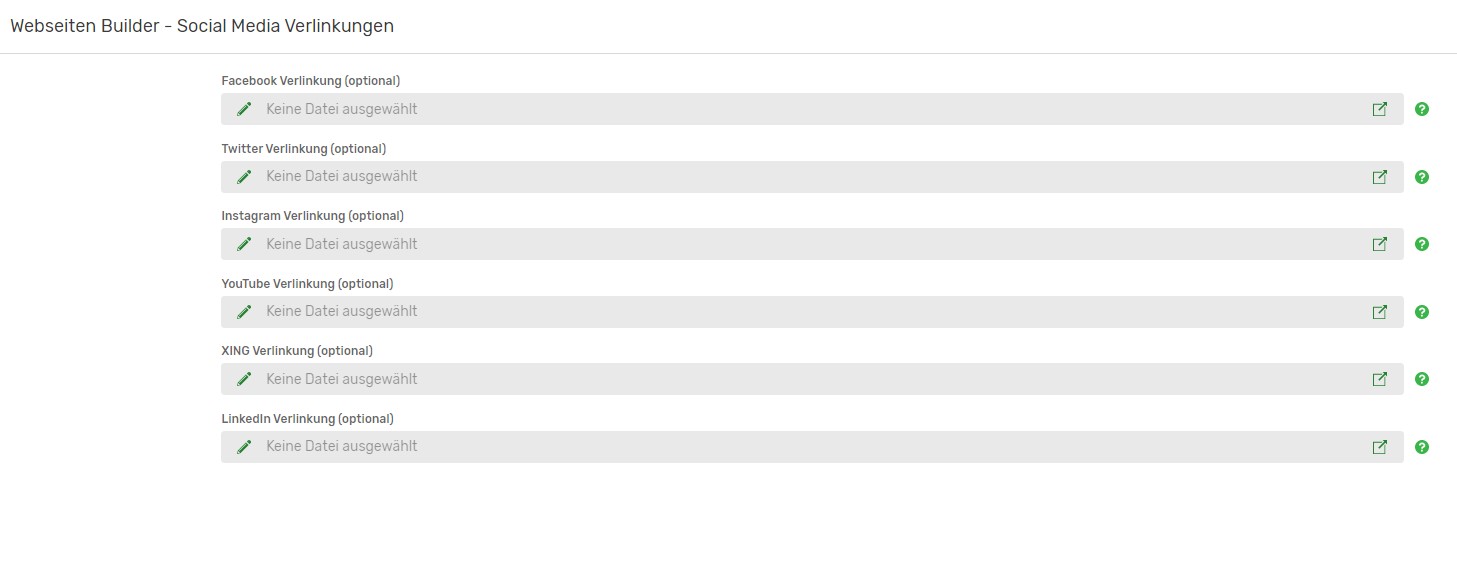
After saving, the social media icons are automatically inserted on the website in the countdown area and in the footer.

Header
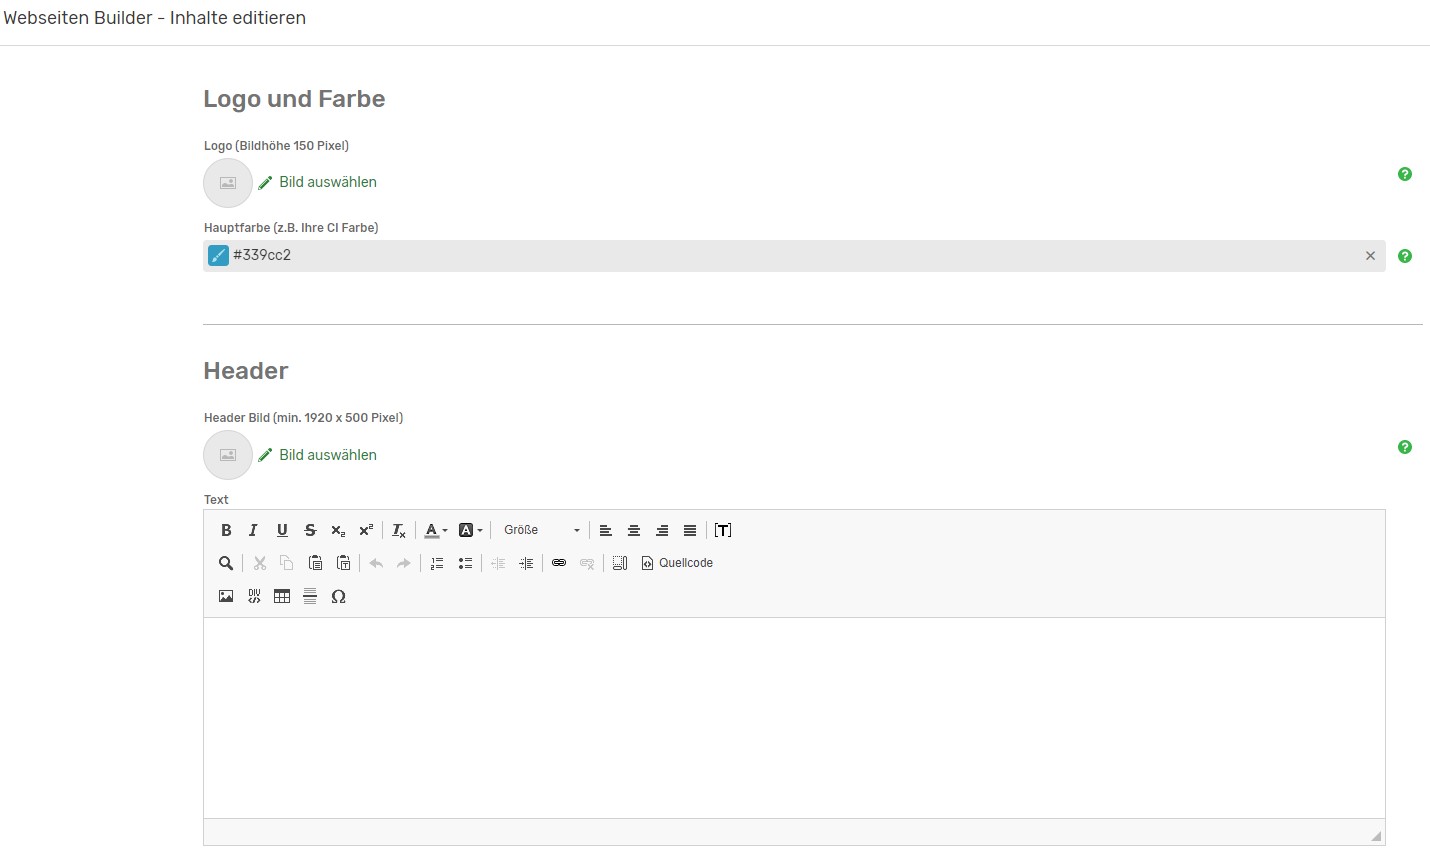
With the help of the following module you have the possibility to provide your website with a header image. This image always appears in the upper screen area of your website and can either be displayed alone or act as a background for your registration form.
In the first step, you fill in general information that you already know from the website builder and the configuration of other modules:
- Menu name
- Heading
- Text
- Background colour
If you do not select an independent background colour, white is automatically selected as the colour.
Upload the image file to be used as the header image.
In expert mode, all other image details can be set.
It may happen that your image is cut off on the web page to fit the page layout. To ensure that no important image details are lost, you can set a minimum height for the header image. To ensure that the mobile image is also displayed according to your wishes, you can also set the minimum height (per pixel) here.
Furthermore, you can decide whether image scaling should be activated or deactivated, and whether the image should adapt when the window size is changed. You can also activate or deactivate the darkening of the header image. You can also darken the background of the registration form so that the font of the registration form is easier to read.
Countdown
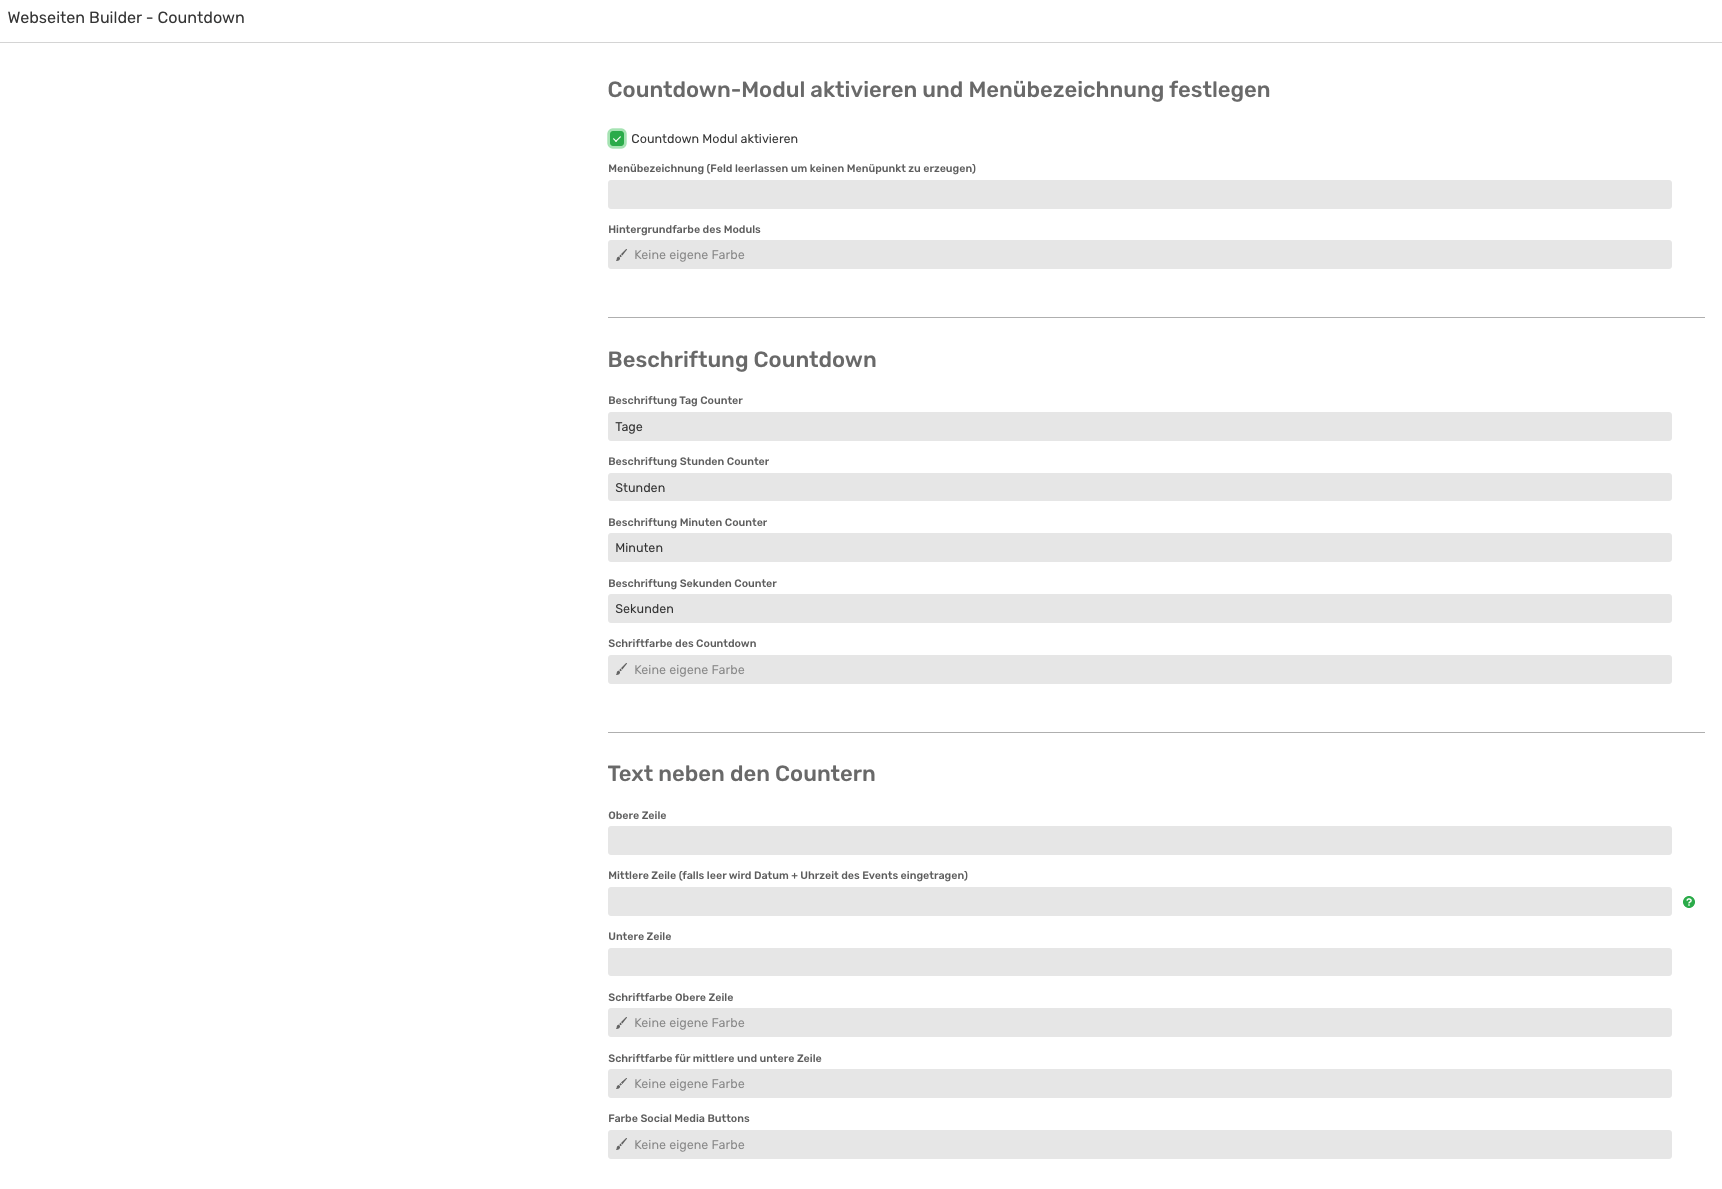
You have the possibility with Sweap to integrate a countdown for your event on the registration page.
Follow the standard settings already mentioned in previous templates, which are requested in many modules:
- Activation of the module on the web page by placing a tick.
- Defining the menu name in the menu bar
- Countdown text
The order of the texts is regulated by the different text fields. If you do not insert any text in line 2, Sweap automatically integrates the date and time of your event at this point.
Individual labelling of the tags is not necessary, as the countdown is automatically labelled with "days", "hours", "minutes" and "seconds".

Text box (only in the Advanced and Complete templates)
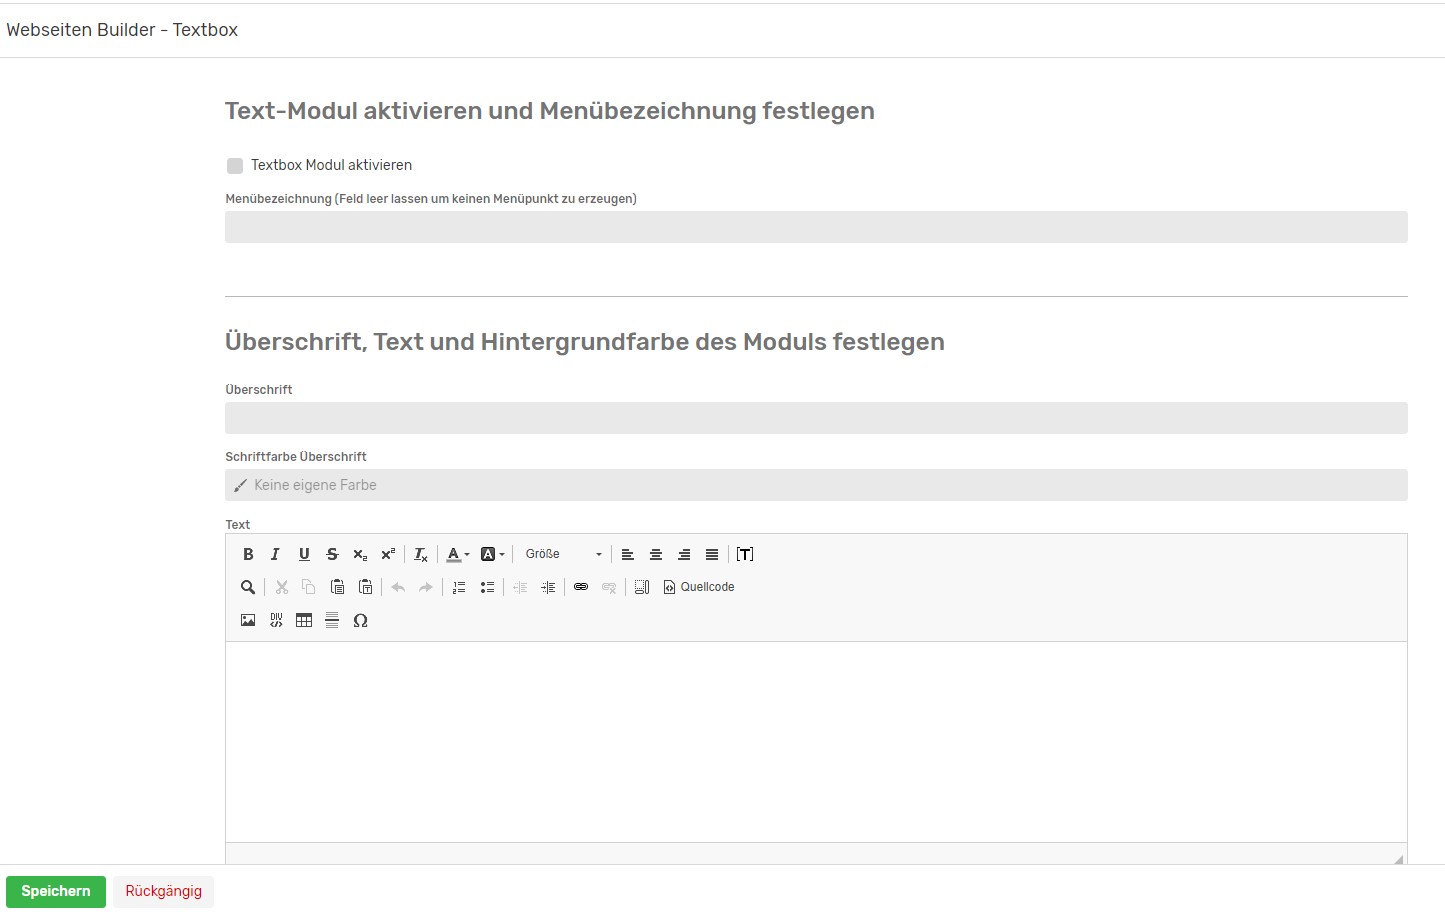
If you create your website with the Advanced or Complete template, you can use this configuration step to integrate a text box on the website. The configuration again follows the familiar steps:
- Activation of the module on the web page by placing a tick.
- Defining the menu name in the menu bar
- Headline
- Font colour Headline
- Text
- Background colour
Programme/Agenda (only in the Advanced and Complete templates)
A complete agenda or the programme of your event can be inserted and published here.
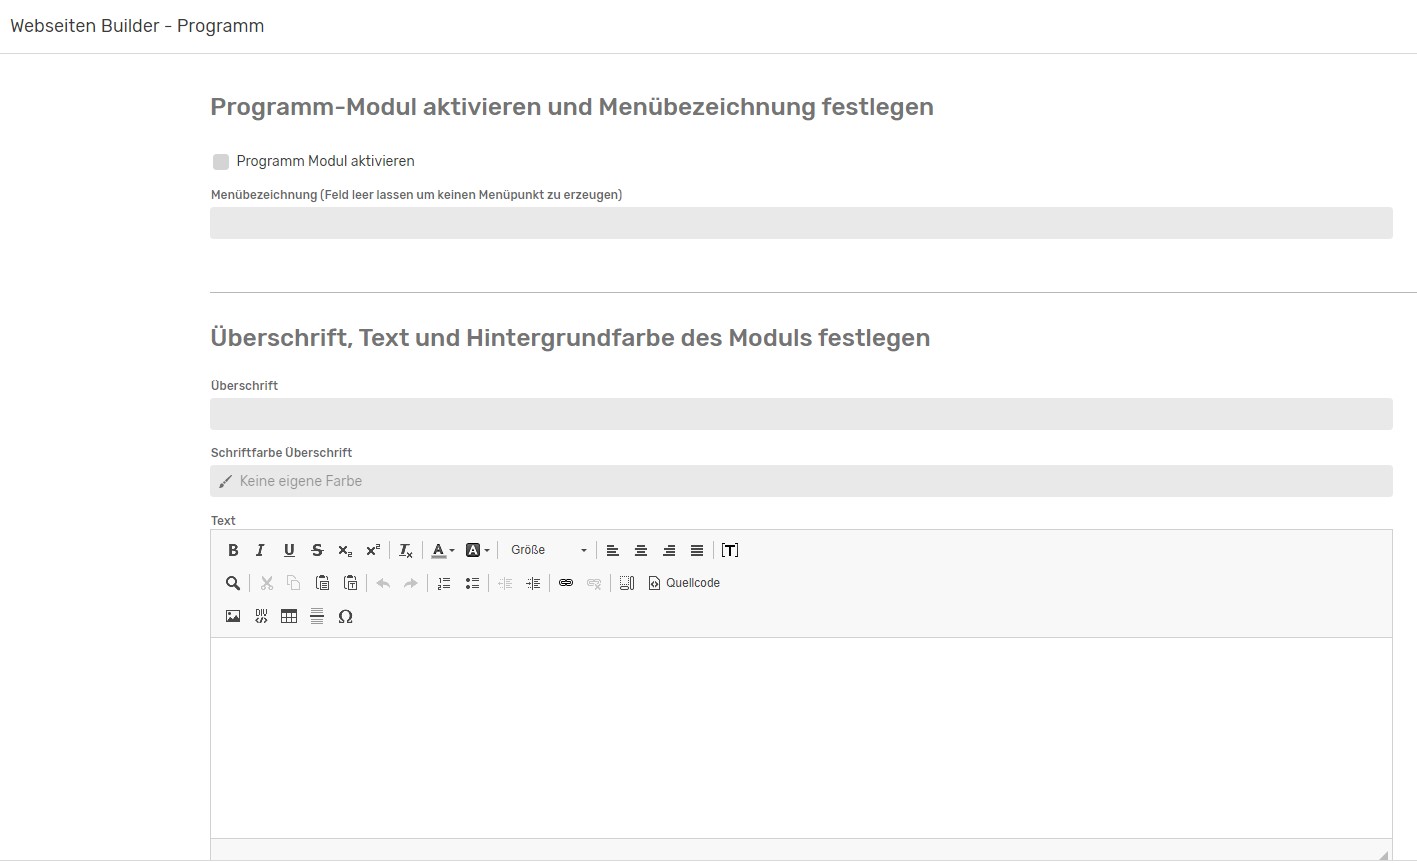
The structure of this module:
- Activation of the module on the web page by placing a tick.
- Defining the menu name in the menu bar
- Headline
- Font colour Headline
- Text
- Background colour
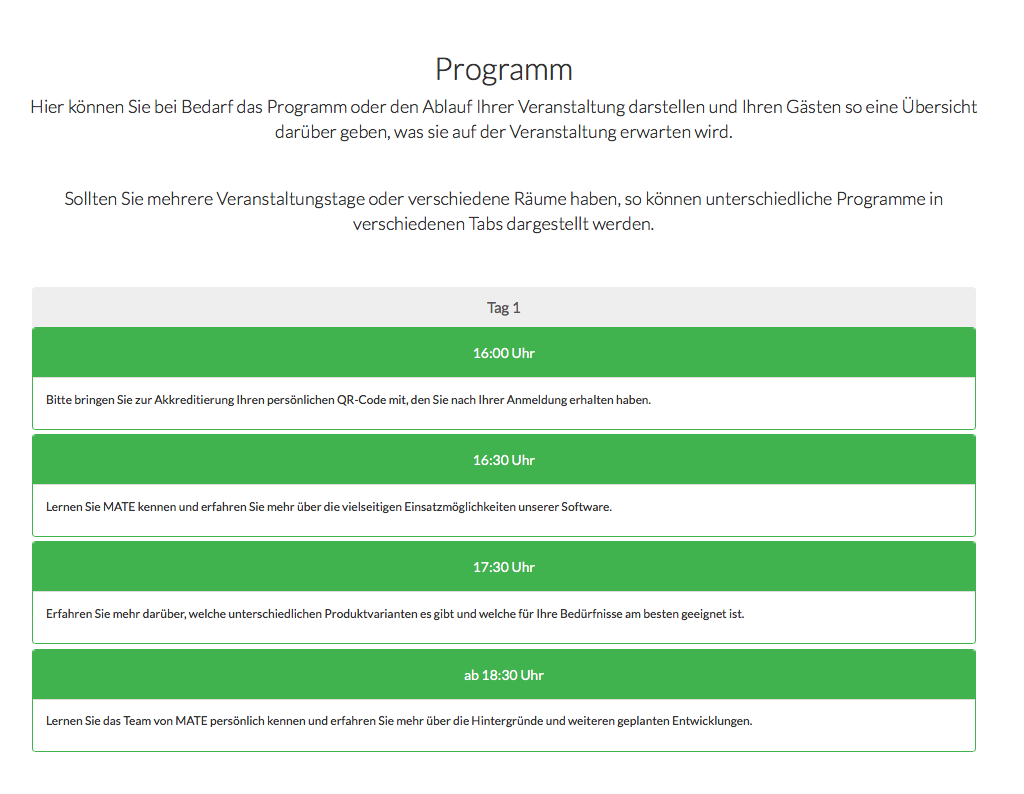
Now the individual programme points can be entered and a font colour can be assigned for these points. You can also assign a tab name to tab 1, i.e. the first programme. In the Complete template, it is also possible to create further tabs in the next templates.
Up to 12 programme points can be stored for each tab. Each individual programme point can be assigned a name and a text.
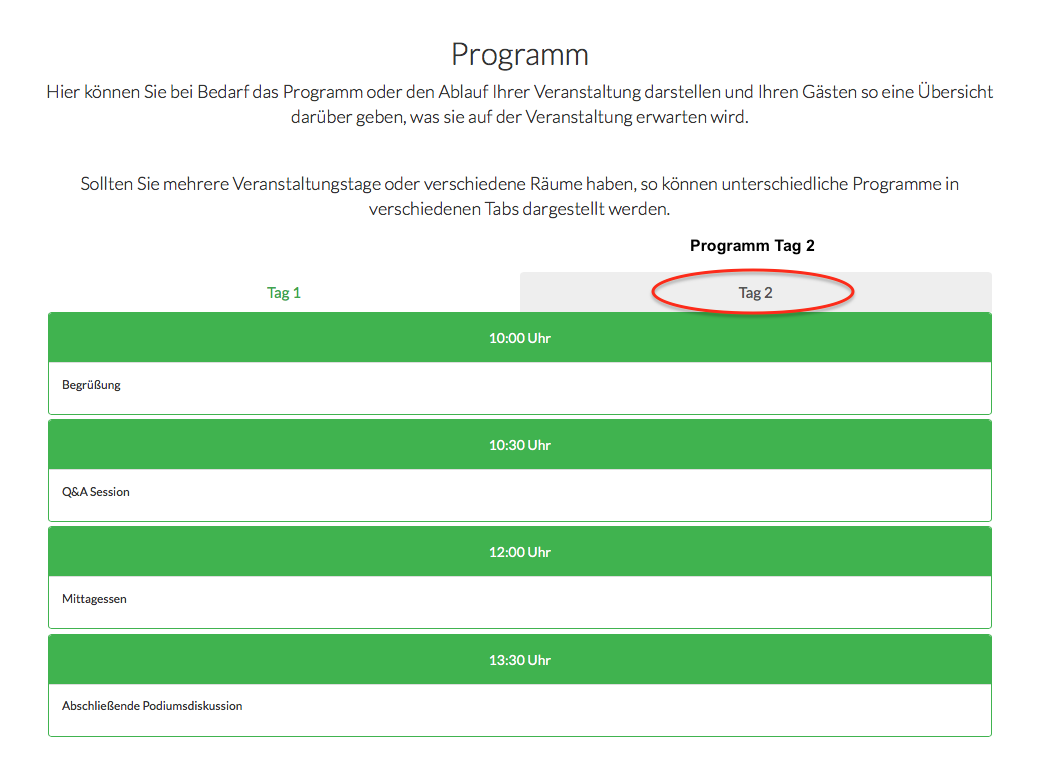
In the Complete template, you have the option of adding further tabs with other programme items. This gives you the opportunity to map several event days or to offer different programmes in different event rooms.
The configuration for all other tabs is the same as for tab 1.
Here is a preview of what the result looks like if you embed 2 event days and thus 2 tabs on your registration page:
Speaker (only in the Advanced and Complete templates)
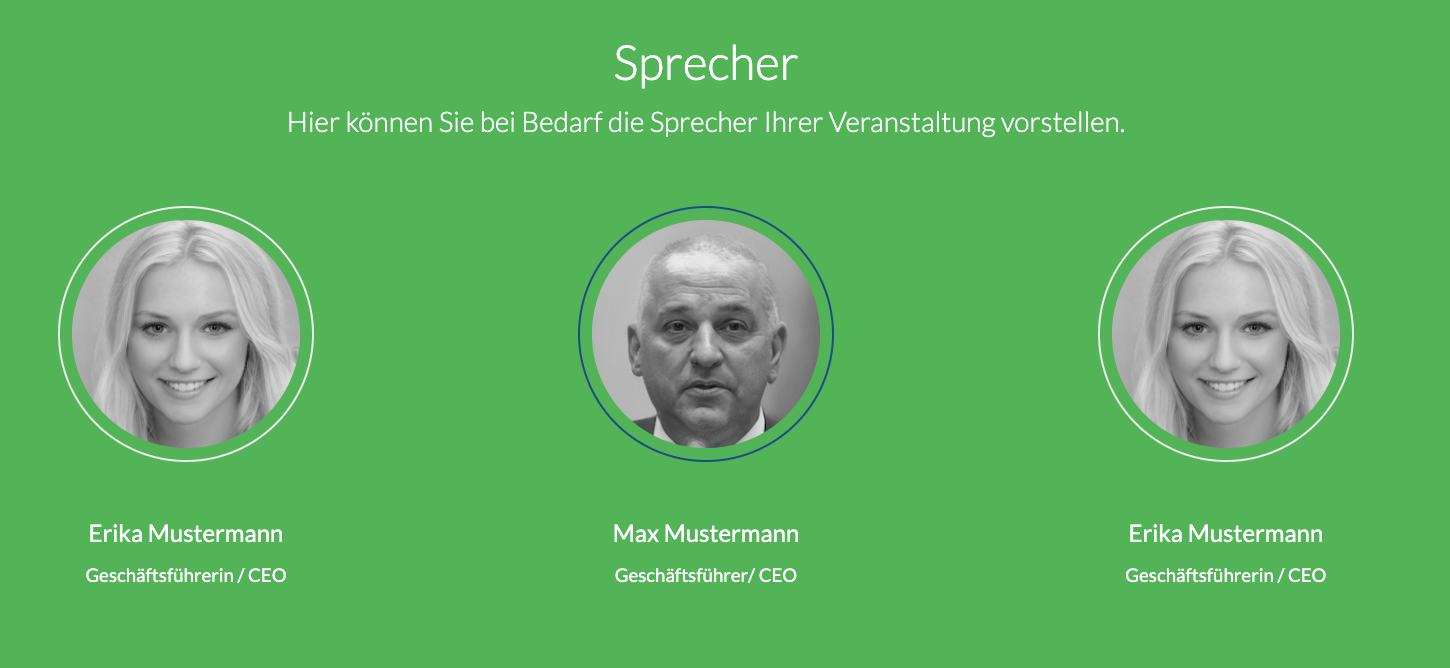
You have invited guests of honour or guests at your event and would like to introduce and communicate them to your guests in advance? This is also no problem with Sweap in the Advanced and Complete website templates.
The first steps are again similar to the basic settings of previous modules:
- Activation of the module on the web page by placing a tick.
- Defining the menu name in the menu bar
- Headline
- Font colour Headline
- Text
- Background colour
Once this has been done, you integrate the individual speakers or guests of honour. In the pre-installed basic template of Sweap, up to 15 speakers or guests of honour can be created. You can assign a picture, a name and a description/function to each speaker.
Picture (right)/ text (left) and picture (left)/ text (right)
Pictures with accompanying texts can be inserted here.
- Activation of the module on the web page by placing a tick.
- Defining the menu name in the menu bar
- Headline
- Font colour Headline
- Text
- Background colour
Picture slideshow (only available in the Complete template)
Another visually appealing element that can be inserted into the website: the picture slideshow. Here, several images can be presented in quick succession. At the moment it is possible to integrate up to 15 pictures within this module. The initial settings correspond to previous modules:
- Activation of the module on the web page by placing a tick.
- Defining the menu name in the menu bar
- Headline
- Font colour Headline
- Text
- Background colour

Video (only available in the Complete template)
As a further highlight, you can use the Complete template to feed a video into the website. The first steps are again similar to the configuration of previous modules.
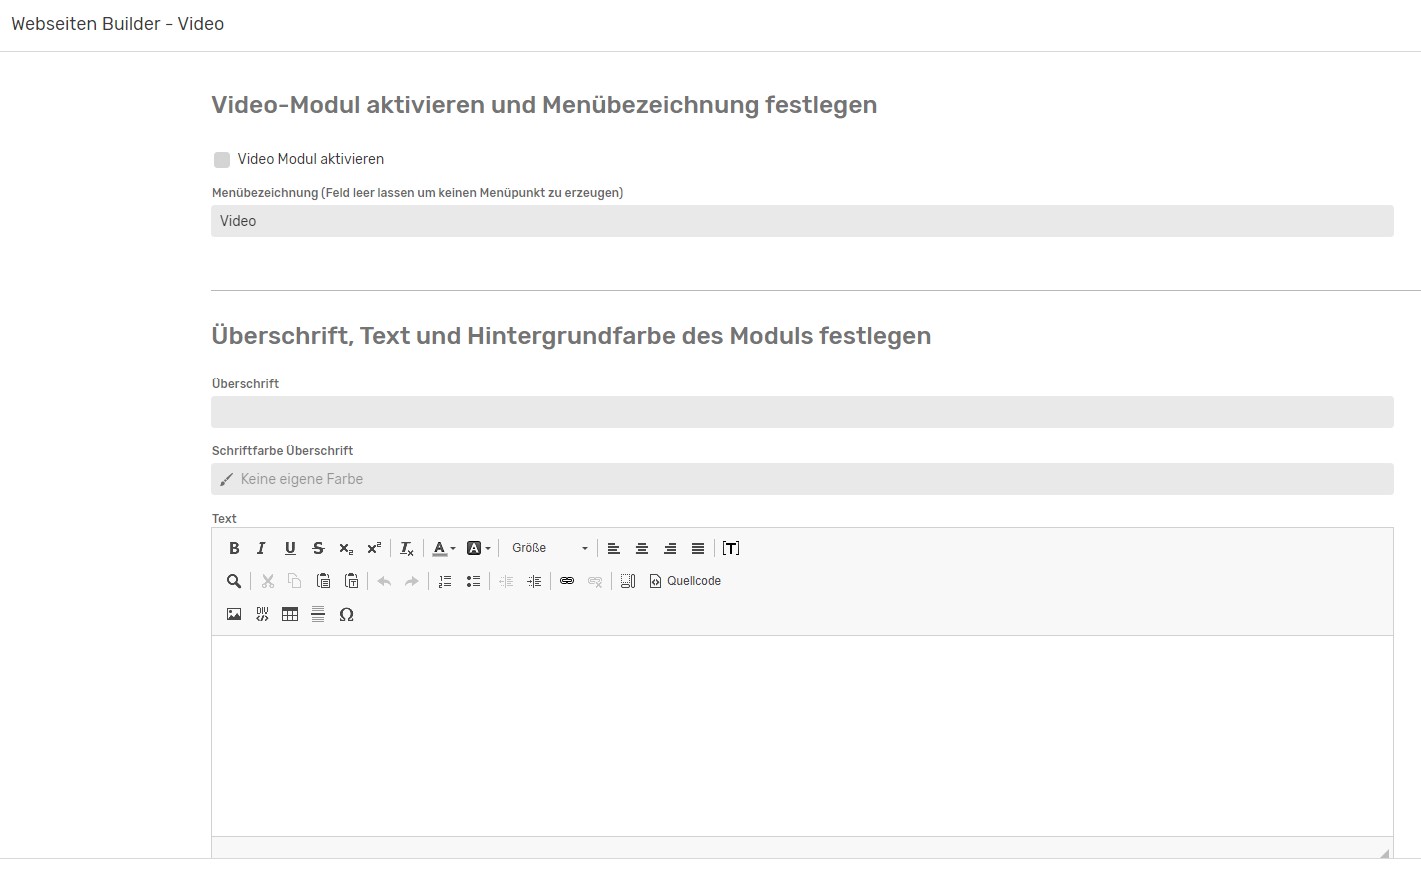
After activating the "Video" module, you can enter a menu name and a heading. Similar to the other modules, the font colour of the heading can be set here, a text can be inserted if required and the background colour of the video can be set.

The following window opens:
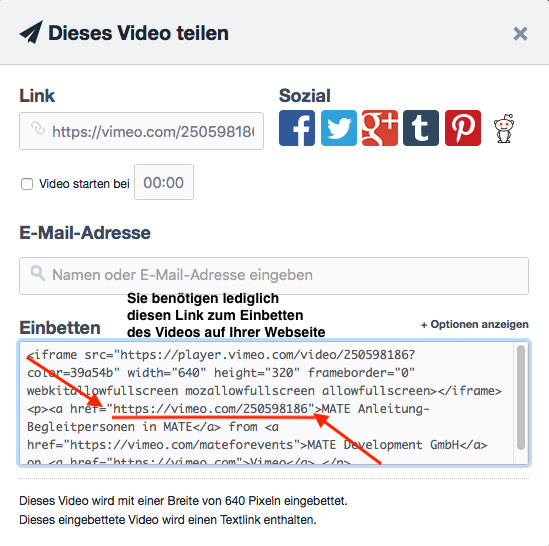
Now copy the link between src="LINK" under "Embed" so that the video appears on the website.
Alternatively, a self-hosted video (for example an mp4 file) can also be integrated. All you have to do is insert the vidoe link.
Partners/ Sponsors (only available in the Complete template)
Possible logos of the partners/sponsors can be uploaded and linked here.
- Activation of the module on the web page by placing a tick.
- Defining the menu name in the menu bar
- Headline
- Font colour Headline
- TextPartner
- Background colour
Currently, up to 55 image files can be integrated within this module of Sweap.
