Table of Contents
- Standard fields in the guest list
- First name and last name
- Attendance state
- RSVP state
- Last response
- Created via
- Visibility of columns / information
- Additional Fields / Guest Information in the Guest List
- External ID
- Companions
- Max. Companions
- Companion of
- Last Response Page
- Category
- Invitation Code for Postal Mailings and Ticket Code
- Blocked
- Bounce Status and Last Bounce Date
- Created
- Last Modified
Standard Fields and Event-Related Information in the Guest List
 Updated
by Julia Walther
Updated
by Julia Walther
- Standard fields in the guest list
- First name and last name
- Attendance state
- RSVP state
- Last response
- Created via
- Visibility of columns / information
- Additional Fields / Guest Information in the Guest List
- External ID
- Companions
- Max. Companions
- Companion of
- Last Response Page
- Category
- Invitation Code for Postal Mailings and Ticket Code
- Blocked
- Bounce Status and Last Bounce Date
- Created
- Last Modified
In this article, we’ll show you how master fields and other information are displayed in the guest list, and how you can customize the view of your guest list.
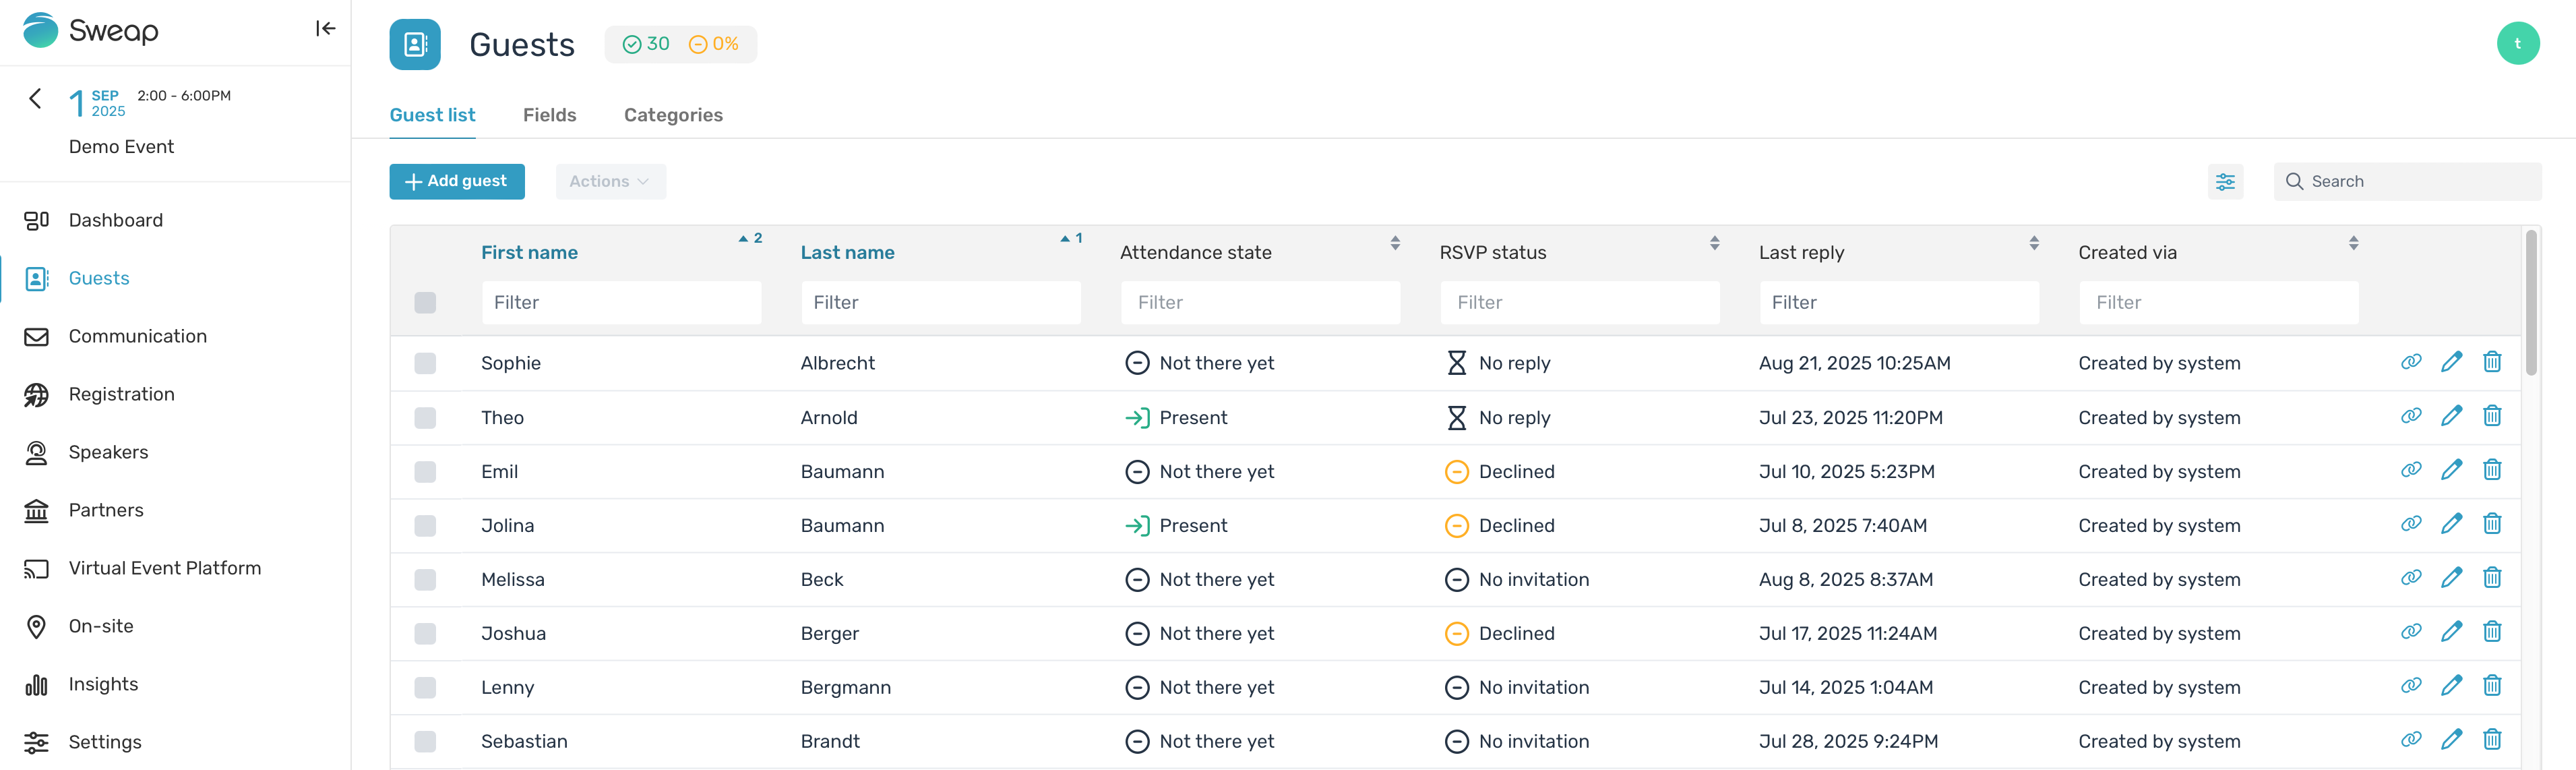
All information related to your guests can be found in the guest list of your event.
Standard fields in the guest list
By default, the guest list displays the following information:
- First name
- Last name
- Attendance state
- RSVP state
- Last reply
- Created via
First name and last name
These two fields are standard fields that are always automatically activated in your event and are therefore always included when building a registration page.Attendance state
The attendance status gives you information about which of your guests are already present at your event, meaning they have already checked in.
For on-site events, you can check in your guests using our guest list app.
A check-in can also be done manually – you can learn how to perform a manual check-in here.RSVP state
With the response status, you can see which guests have not yet received an invitation, have not yet responded (“No response”), or have accepted or declined.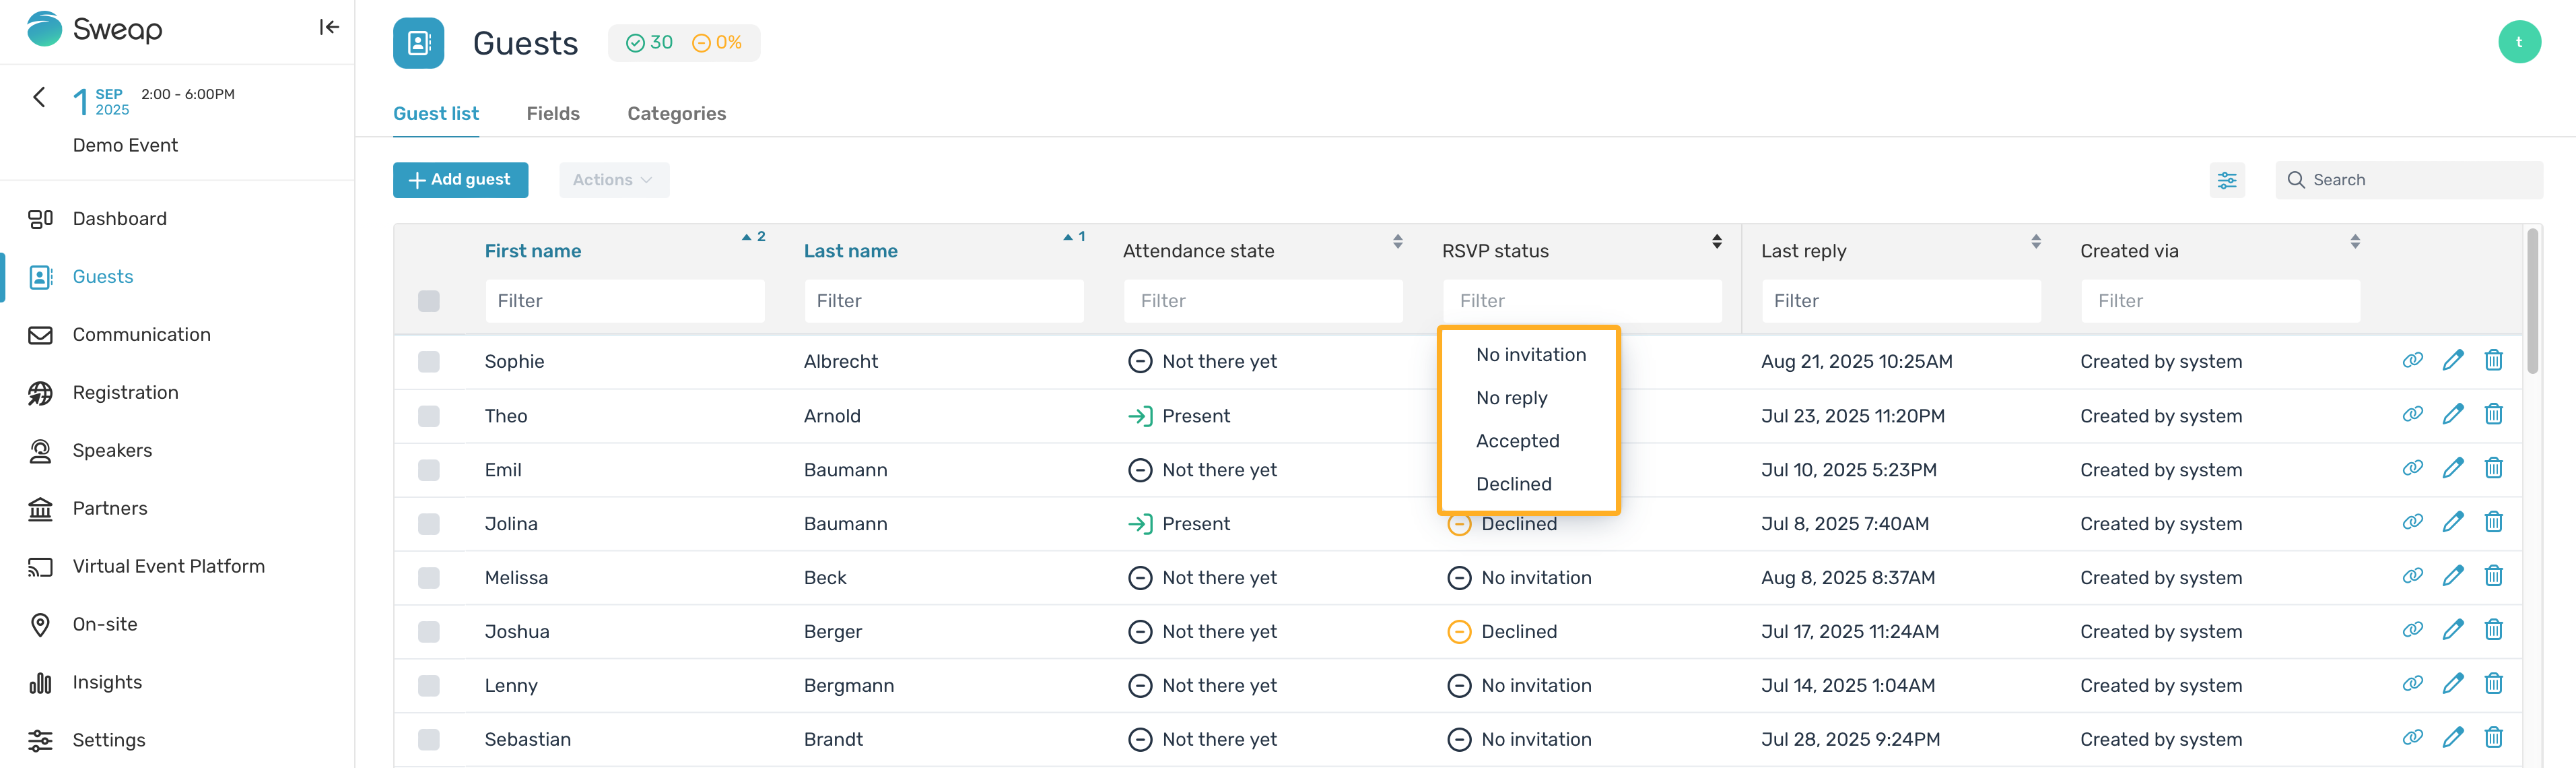
As you can see, we distinguish between the following four statuses:
- No invitation
- No reply
- Accepted
- Declined
The response state is automatically updated based on certain actions.
Sending an invitation email and Sending an invitation reminder | --> Status change from “No invitation” to “No response” |
Sending a confirmation email and Sending a reminder for participants | --> Status change to “Accepted” This change is independent of the previous status |
You can find more details about the response status here.
Last response
This timestamp gives you information about when your guest last submitted a response via the registration page.
Created via
Here you can see the information about which “guest source” your guest originates from.
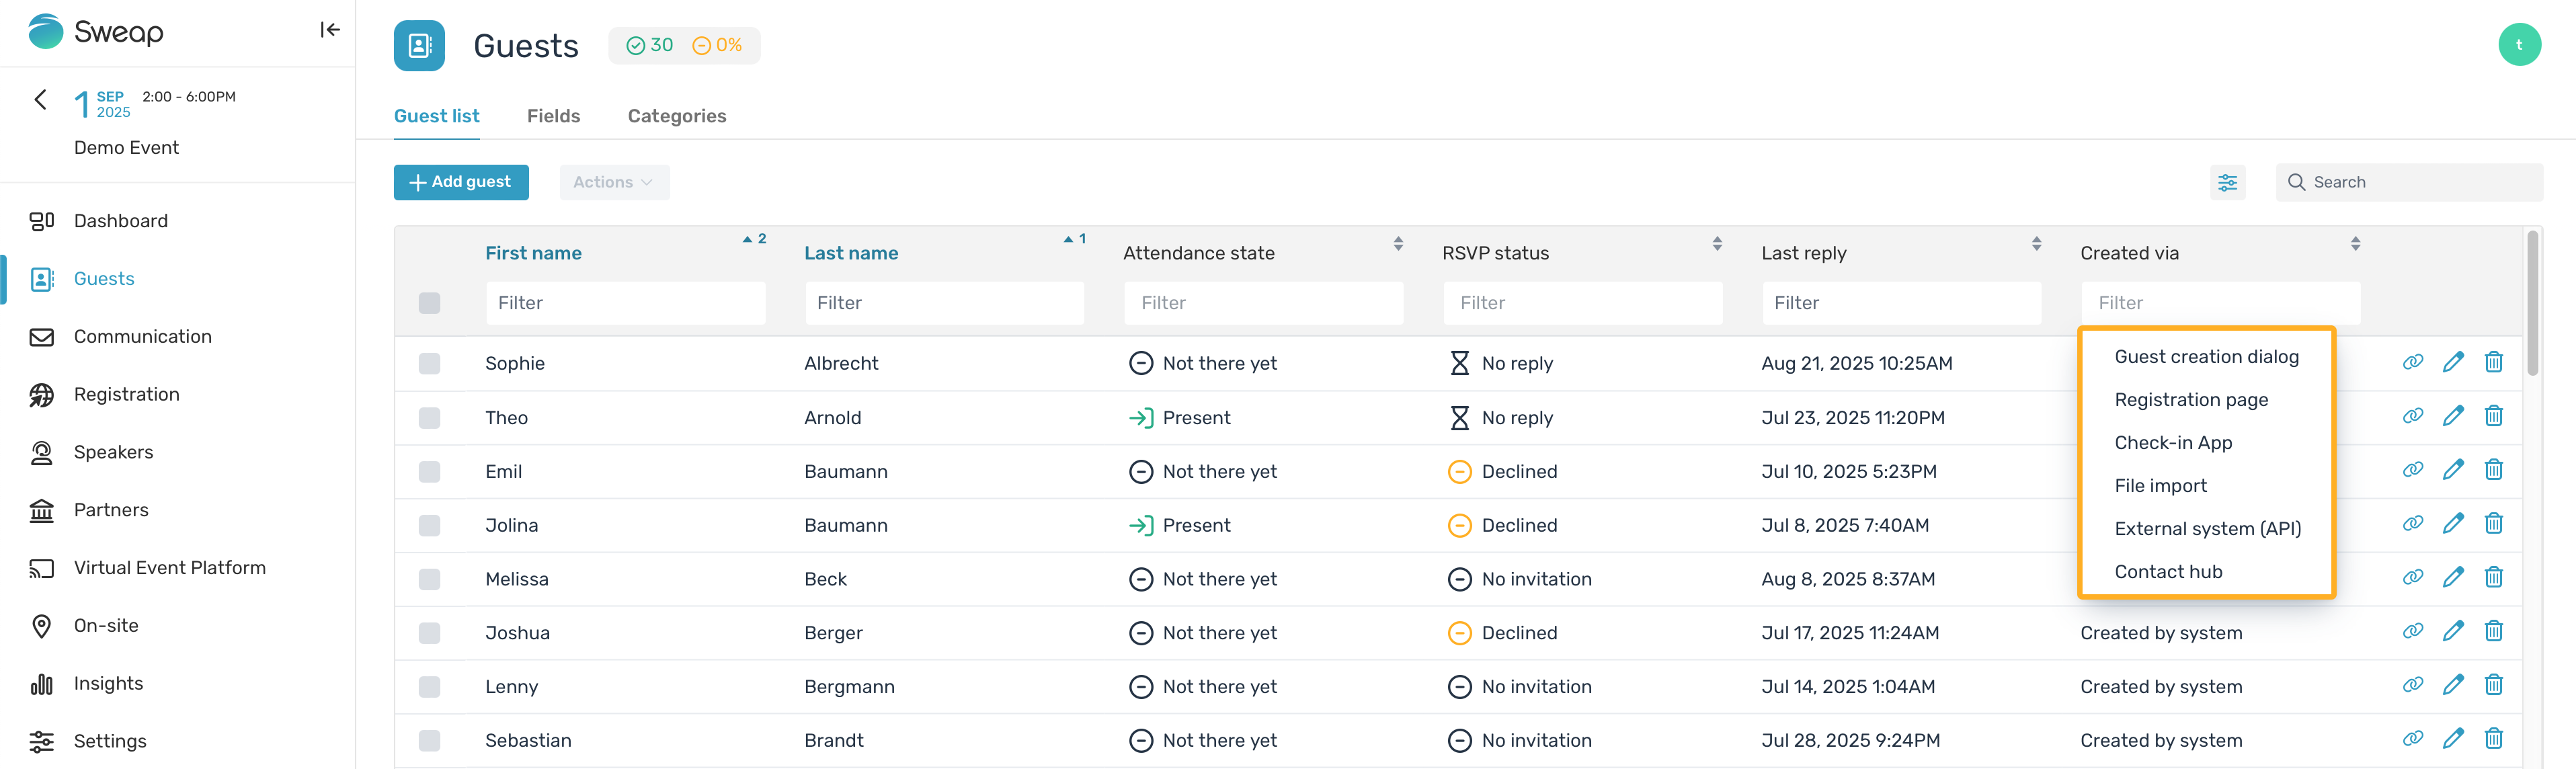
The following guest sources are available in Sweap:
- Guest creation dialog
- Registration page
- Check-in app
- File import
- External system (interface)
- Contacts
Visibility of columns / information
The view of your guest list can be expanded with additional fields. All fields created in your event can be displayed in your guest list.
To display additional fields, click the icon at the top right of the guest list and select the fields you would like to show.
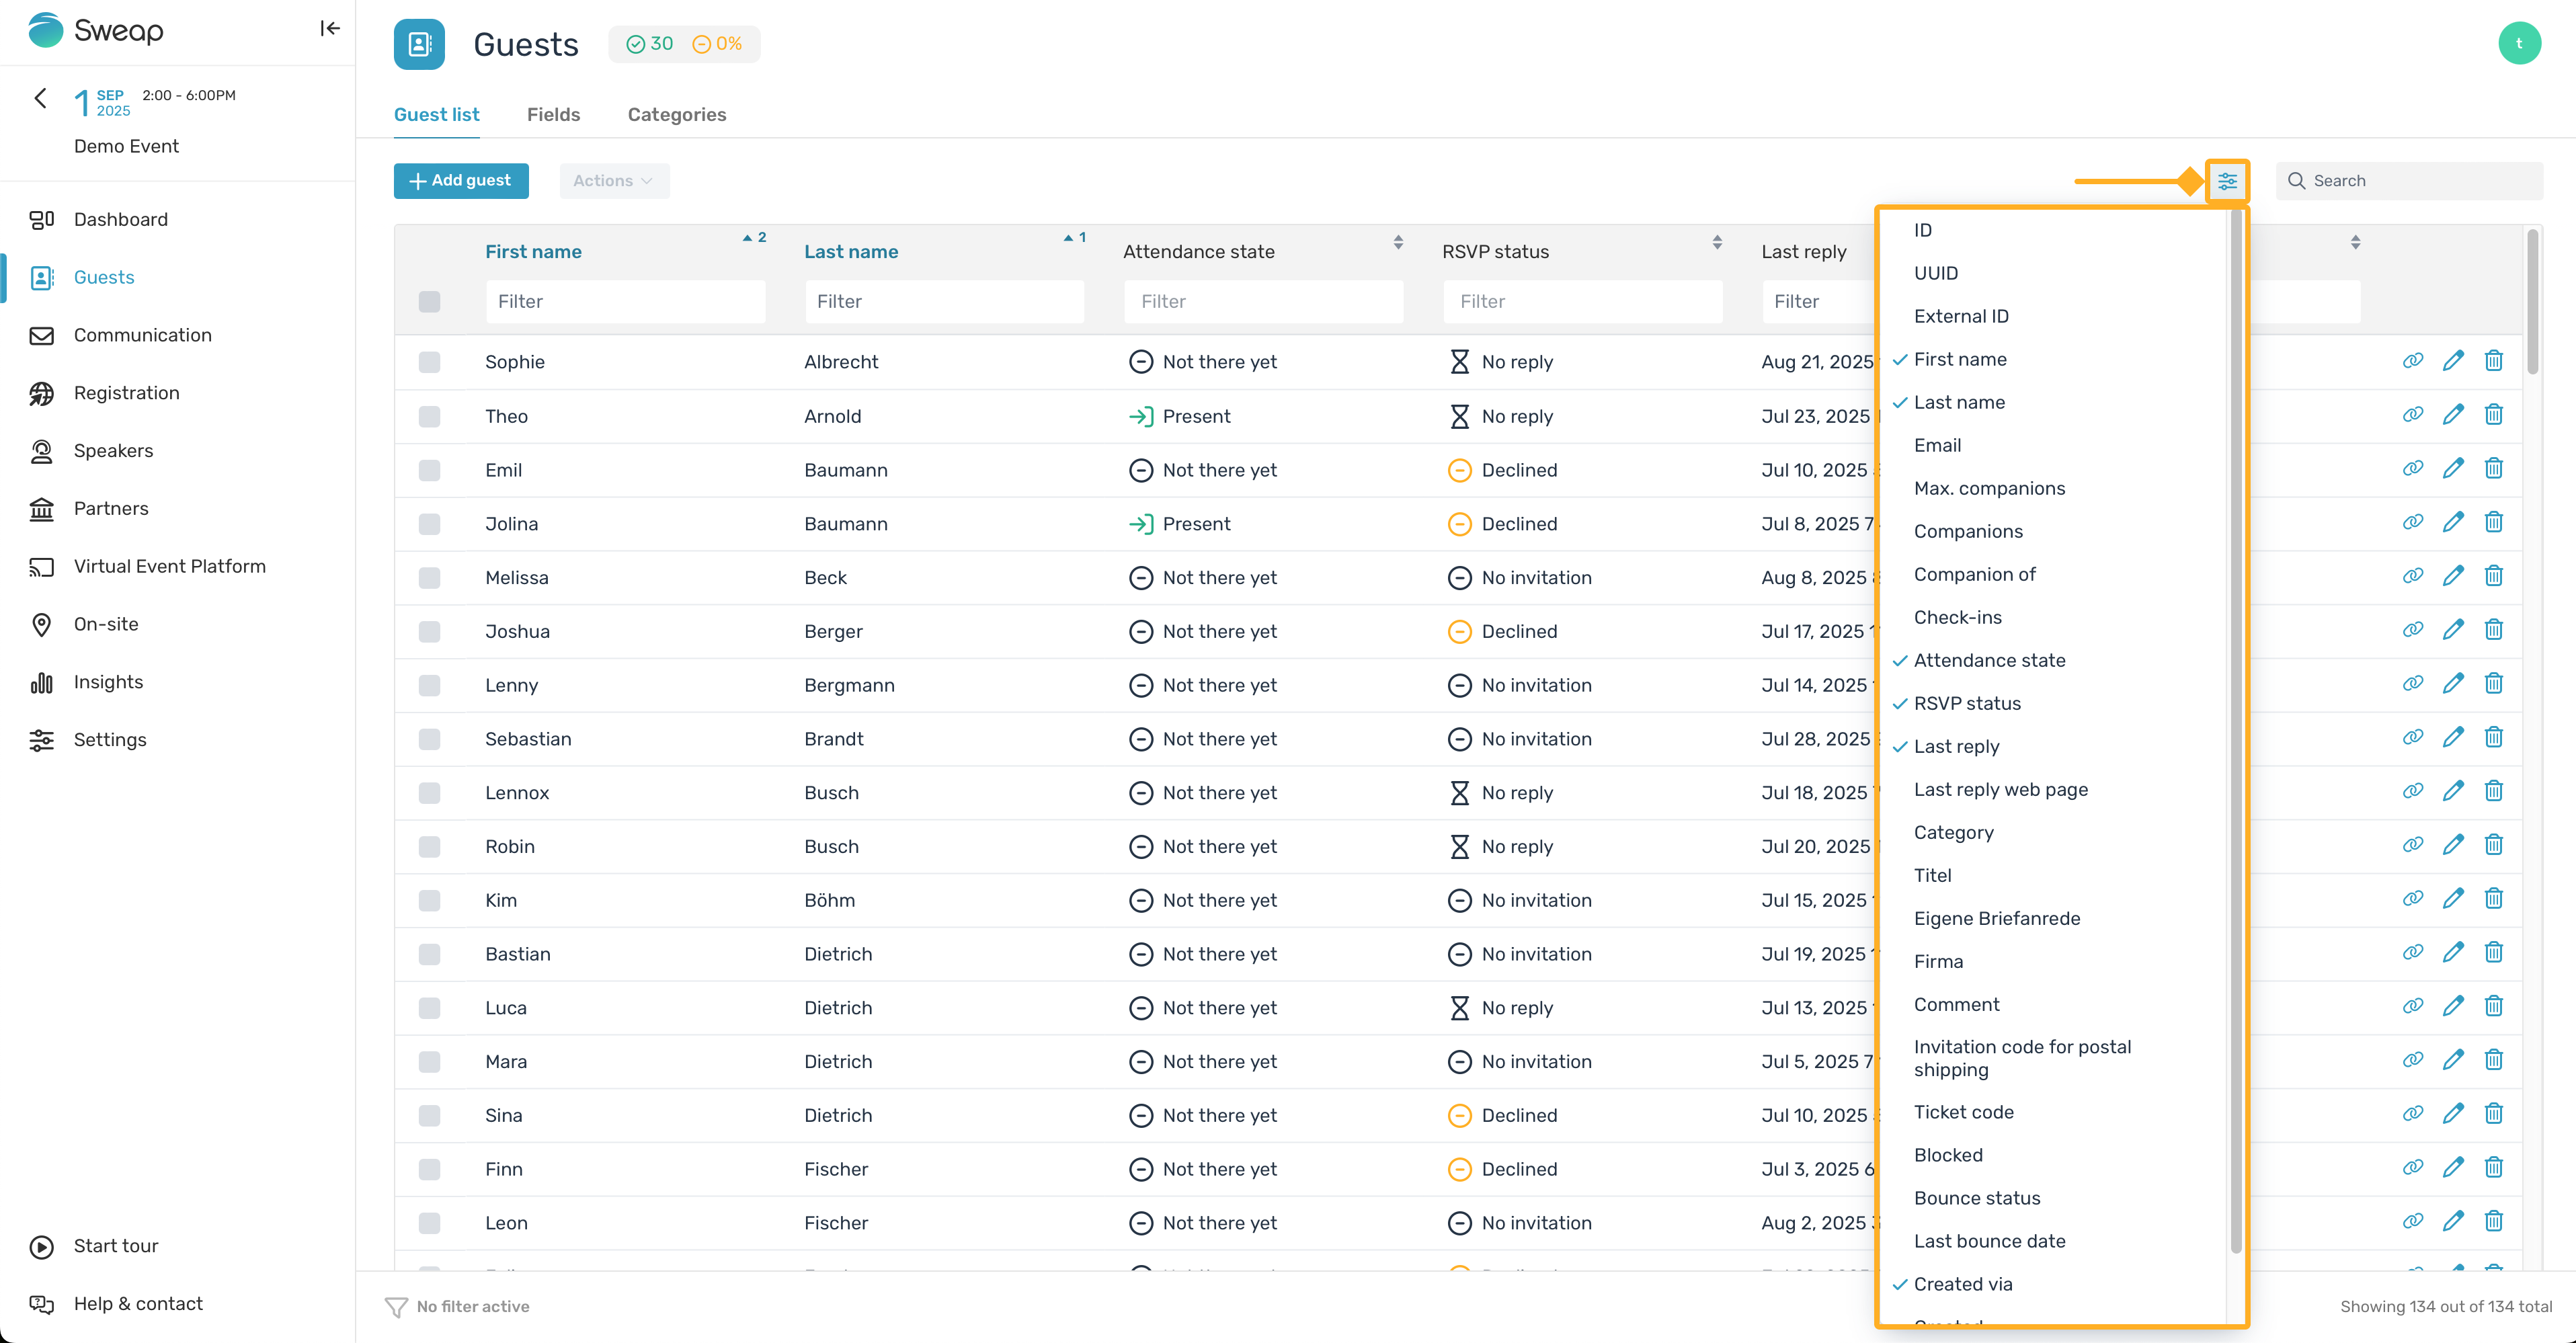
You can determine the sorting of your columns via drag & drop. Move your columns into the desired order to create an efficient overview.
Additional Fields / Guest Information in the Guest List
Below we explain some of the additional fields / guest information that you can display in the guest list in more detail.
External ID
- Using an interface (API) to Sweap:
The external ID field is automatically filled once guest information is imported from an external source and those guests are assigned an extra ID by that source.
- Manual import with an Excel file:
The ID of the import system can be included during import to ensure or simplify later updates or the clear assignment of modified guest data.
Companions
Here you will find a numerical entry for the number of companions registered by your main guest.
Max. Companions
You can individually limit the number of companions per guest – this value can of course also be viewed in the guest list. More information on setting individual limits for companions can be found here.
Companion of
This column displays the name of the main guest to whom the companion belongs.
Last Response Page
This column shows the name of the registration page through which your guest registered. This information is particularly useful if you used multiple registration pages for your event and carried out a form of guest segmentation via them. More information on using more than one registration page can be found here.
Category
Categories allow you to group your guests into different segments. For example, you can send targeted emails to VIPs, or at the on-site check-in the reception can immediately see if the guest belongs to a specific category. More information on categories can be found here.
Invitation Code for Postal Mailings and Ticket Code
If you would like to invite your guests by postal mail, for example, you can first generate an invitation code for them. A code-protected registration page will then display a pre-filled form after the code is entered, making registration significantly easier for the guest.
If you want to send your guests their tickets by post or other means, but still carry out check-in via our Guest List App, you can generate the corresponding ticket codes and distribute them separately to your guests.
Blocked
If a guest has used the unsubscribe function in one of your emails, this will be displayed in this column.
Bounce Status and Last Bounce Date
The bounce status indicates whether a sent email has successfully reached the guest. The last bounce date shows the timestamp of the most recent failed delivery (bounce).
The bounce status does not only refer to the event-related email send-out but to the guest’s stored email address. If a bounce was already reported for that guest’s email address in the past, it will be shown in the list, even if no emails have yet been sent for this event.
Sweap differentiates between:
No Bounce | Everything is fine – the email was successfully delivered to the recipient. |
Soft Bounce | The email reached the recipient’s mail server but did not make it to the recipient’s inbox. |
Hard Bounce | The email is permanently undeliverable. |
Blocked | The service provider stopped the delivery. |
Detailed information about delivery reports and bounces in the email log can be found here.
There are many different reasons why emails may be poorly delivered or not delivered at all. Further information on possible causes can be found here.
Created
Regardless of the origin of your guest, this timestamp shows you when the guest record was created in Sweap.
Last Modified
This timestamp shows when the last change was made to the respective record.